How to Automate Bare Metal Provisioning with Tinkerbell

Do you want to use bare metal servers? and are you not using it because you are scared of setting and maintaining it up? Here, we have Tinkerbell - which provides quite a simple way of setting up and provisioning a bare metal machine.
This fulfills the need and now you should not worry about the complexity of setting up your bare metal machine. You can use Tinkerbell even to setup your VMs and can do lot more things besides provisioning. For example, installing some required software after provision or setting up a k8s cluster and much more.
In this post, we will talk about the use cases of bare metal servers in today’s cloud native world and the challenges which people generally face. And then we discuss how Tinkerbell can help us as an overall solution to overcome these bare metal server provisioning challenges.
Excited? Let’s begin then!
Bare metal servers and their use cases:
Bare metal servers are omnipresent - from rack of servers that are present in a Data Center of a company to an RPi board in a small IoT devices. Let’s pin point on some real-world use cases:
- There are organizations that would like to use their on-premise infrastructure and build a private cloud.
- Bare metal is also applicable where data security comes into the picture. Security is very important aspect and a private infrastructure lets you configure the way business would like. For example, account holders data of any bank.
- With the Bare Metal servers, organizations can tune their performance on the basis of cost, consistency, and predictability. These properties are hard to bargain from the public on public clouds.
- The increase of control is also a big advantage of bare metal servers as compared to cloud servers.
What makes bare metal servers challenging?
-
Administration cost: If a user would like to setup a large Data Centers which consist of hundreds of servers. In this case it would be difficult to manage this large infrastructure. For example, provisioning each server and maintaining its life cycle.
-
Hardware Cost: There are cases where a user needs to setup the infrastructure with different CPU structures. For example Intel x86-64, ARM, etc and different distros like CentOS, Ubuntu, etc. In this case, it is again a bit difficult to change the configuration of an already configured/setup server again and again as per the requirement changes.
-
Maintenance: “Increase of Control comes with Increase of Complexity”. The user will have more control over the bare metal server. But again to configure/reconfigure a bare metal server is more complex than a cloud server.
How does Tinkerbell solve these challenges?

There are few micro services in Tinkerbell and each one of them handles a particular task while doing a Network boot for a bare metal server. Let’s talk about them very quickly:
- Boots: When you reboot a bare metal in iPXE/Network mode it first tries to fetch the IP by broadcasting a DHCPDISCOVER packet in the private network. Boots handles this request/packet and offer the IP asked by to that machine.
- Hegel: Hegel is the metadata service used by Tink and OSIE. It collects data from both and transforms it into a JSON format to which we call metadata.
- OSIE: OSIE provides an in-memory installation environment. It installs the operating system and handles de-provisioning.
- PbnJ: PBnJ is a microservice that can communicate with baseboard management controllers (BMCs). It controls power and boot settings.
- Tink: This is the main workflow engine and responsible for processing the workflows. This component has the following three different binaries
-
- tink-server: This is a server which handles the request for CRUD operation on gRPC . This handles the creation or workflows and it’s building blocks, template, and targeted hardware.
-
- tink-cli: The CLI is used to create workflows and their building blocks, templates, and hardware data.
-
- tink-worker: This is a service that runs on the targeted hardware, a machine in which the user wants to provision and execute the workflow.
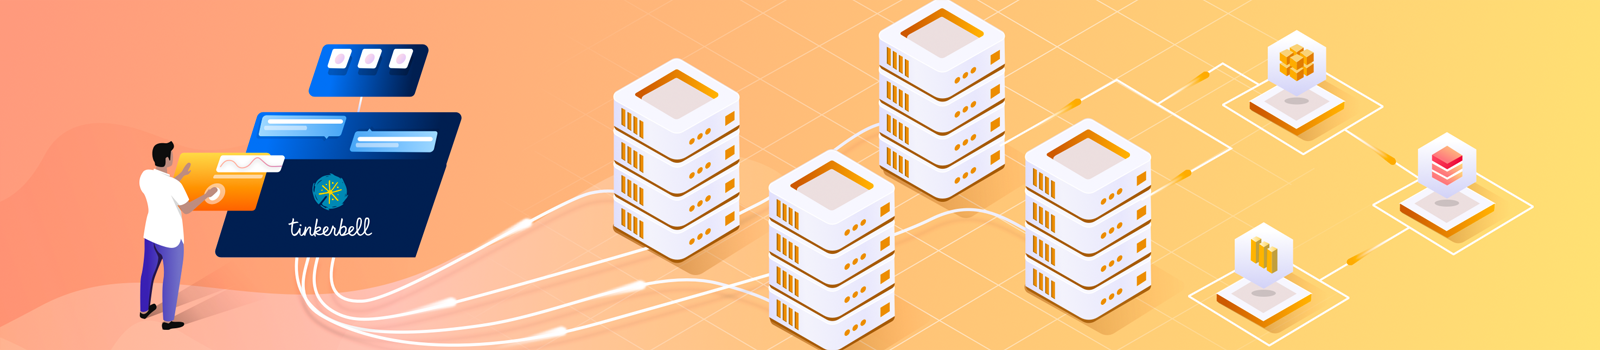
Tinkerbell architecture:

As seen in the above diagram, Tinkerbell has a control server which is called ‘Provisioner’. On this machine all the services of Tinkerbell mentioned above will be running inside its own docker container. The following are few other processes which will also be running on the Provisioner machine:
- PostgreSQL: Tinkerbell uses PostgreSQL as its data store. Psql is required to store and maintain workflows and all the other information which is required to create/maintain a workflow like templates, information of targeted Hardwares etc.
- Image Repository: A private docker registry will be hosted on the Provisioner. In this private registry docker images of tink-worker and of all the actions which are part of workflow (defined in template) will be stored and worker machine will fetch those images from this private docker registry. This is particularly useful for secure environments that don’t have access to the internet.
- [NGINX](https://www.nginx.com/: NGINX is a web server. Tinkerbell uses NGINX to serve the required boot files during workflow execution.
On the Provisioner, the complete stack of containers services/components looks like as shown below:

How to provision a bare metal with Tinkerbell:
The following are the steps through which a bare metal server can be provisioned to an Ubuntu 18.04 OS. The following operation performs through the tink-cli container:
1. Setup the provisioner:
User can setup the Provisioner on a hardware machine or on a VM as well. The instruction for the setup of Tinkerbell.
2. Create a hardware inventory:
In this step, data of all the hardware (bare metal servers) which needs to be provisioned will be pushed to the database. The data will be in JSON format. Following is the minimal hardware data which you need to push for particular hardware:
{
  "metadata": {
    "instance": {},
    "facility": {
      "facility_code": "onprem"
    }
  },
  "network": {
    "interfaces": [
      {
        "dhcp": {
          "mac": "98:03:9b:89:d7:aa",
          "hostname": "localhost",
          "arch": "x86_64",
          "ip": {
            "address": "192.168.1.6",
            "netmask": "255.255.255.248",
            "gateway": "192.168.1.1"
          }
        },
        "netboot": {
          "allow_pxe": true,
          "allow_workflow": true
        }
      }
    ]
  },
  "id": "f9f56dff-098a-4c5f-a51c-19ad35de85d4"
}
For a detailed description of the hardware data you can visit Hardware_Data page. User should keep the above information inside a file. Following is the command of “tink” CLI through which you can push the data of the hardware:
docker exec -i deploy_tink-cli_1 tink hardware push < <path to hardware data file>
> 2020/08/24 16:23:09 Hardware data pushed successfully
Just like the above user can push the data of all the Hardwares which are required to be provisioned.
3. Create templates:
In this step user needs to create templates. Templates are Yaml based definition of a workflow which contains all the tasks/actions which should execute to provision a machine. User can create multiple templates but each template with unique names. For example, if a template contains tasks/actions which are for Ubuntu provisioning, can have name as “Ubuntu-template” or a template for CentOS can have name as “Centos-template” etc. Following is a sample of a template:
version: "0.1"
name: ubuntu_provisioning
global_timeout: 6000
tasks:
  - name: "os-installation"
    worker: "{{.device_1}}"
    volumes:
      - /dev:/dev
      - /dev/console:/dev/console
      - /lib/firmware:/lib/firmware:ro
    environment:
      MIRROR_HOST: <MIRROR_HOST_IP>
    actions:
      - name: "disk-wipe"
        image: disk-wipe
        timeout: 90
      - name: "disk-partition"
        image: disk-partition
        timeout: 600
        environment:
          MIRROR_HOST: <MIRROR_HOST_IP>
        volumes:
          - /statedir:/statedir
      - name: "install-root-fs"
        image: install-root-fs
        timeout: 600
      - name: "install-grub"
        image: install-grub
        timeout: 600
        volumes:
          - /statedir:/statedir
As per the template definition above, it supports tasks and actions under each task. Each action will be running as a container on the worker machine. Templates have volume mount support at task and action levels as well.
If we provide a volume at a task level, each action under that particular task can mount the volume. And if we provide a volume at the action level, only that particular action can use that volume. The template also supports environment variables in the same way as volume mount support. If there is any change in the template in the future you can always refer to sample-ubuntu.tmpl. Each task contains a field “worker” which has value as “{.device_1}”. The value of “device_1” will be replaced with the mac address of the targeted hardware while creating the workflow in the next step. Following the command through which you can create/insert a template in the database:
#docker exec -i deploy_tink-cli_1 tink template create < <path to template file>
Created Template:  489da4a1-6672-461b-9b09-9aa67b8938f9
Creation of a template generates a unique id (UUID) which we will be use during workflow creation. For example in the above case the UUID for the created template is “489da4a1-6672-461b-9b09-9aa67b8938f9”.
4. Create workflows:
After completion of above two steps we need to create a workflow. To create a workflow we need one template (UUID) and MAC address or IP address of the targeted hardware. Following is the command which creats the workflow:
#docker exec -i deploy_tink-cli_1 tink workflow create -t <template uuid> -r '{"device_1":"<MAC/IP> address of targeted hardware"}'
Created Workflow:  2a4d1101-8ad2-4c5c-9822-c541d1775151
5. Reboot the targeted hardware in iPXE mode:
After creating a workflow for a particular mac address, We should reboot the machine which has that mac address in the iPXE mode. Once the reboot starts, first it will ask for an IP through DHCP service provided by boots. Then it will ask for few files required for OS installation to OSIE through Nginx. After that it boots into base OS and then it ask tink-server to provide the workflow which we created for this hardware. Then that workflow start executing by the worker machine. Once the workflow completed successfully. we should reboot the machine so that it can boot into the newly installed OS.
What’s next for Tinkerbell?
Packet open-sourced the Tinkerbell few months back. We received a lot of responses from the community including few interesting things. People are already doing great things like automating Raspberry Pis, installing Kubernetes on their home lab setups, and, of course, finding a lot of areas for improvement. We’re loving it, and we welcome your comments, questions, and PRs or issues.
We hope you find it interesting and like to engage with us to contribute back to the community and help us with our mission of making infrastructure a competitive advantage. Join us on Slack and look for the #tinkerbell channel.
Also, have a look at the website for more details about Tinkerbell.
Hope this was helpful to you. Do try Tinkerbell and share your experiences with us via Twitter and LinkedIn. Happy Coding :)
Looking for help with building your DevOps strategy or want to outsource DevOps to the experts? learn why so many startups & enterprises consider us as one of the best DevOps consulting & services companies.
Stay updated with latest in AI and Cloud Native tech
We hate 😖 spam as much as you do! You're in a safe company.
Only delivering solid AI & cloud native content.
Posts You Might Like