AI Agents for Kubernetes: Getting Started with Kagent

One of your services is down in the Kubernetes cluster, pods are stuck in CrashLoopBackOff, and Slack or PagerDuty is buzzing with alerts. Like any SRE or DevOps engineer, you would probably first check your runbooks, internal KB, and team docs. Maybe you ping a teammate for a quick huddle. But when those don’t give answers fast enough, you copy the error from your logs, paste it into ChatGPT, and hope for a clue. It suggests a fix, you try it. New error. Back to ChatGPT. Another fix, another test.
Eventually, you get it working with the help of AI, but not before you’ve wasted an hour being the middleman between your cluster and an LLM. If you’ve been there, you know the frustration. AI assistants are powerful, but don’t see your infrastructure.
In this blog post, we will overcome these limitations of LLMs/AI. We will also discuss why AI agents are the next big step for DevOps and how Kagent makes agents real inside Kubernetes.
From AI to agents: What’s the big deal?
When most people hear AI today, they immediately think of ChatGPT or Gemini. But an LLM isn’t the whole of AI. It’s one powerful piece, specialized in understanding and generating language.
Artificial intelligence also includes systems that predict trends, detect anomalies, or even process images, but in DevOps, what we meet daily are language models. DevOps uses LLMs in various ways. Something in production breaks, a pod won’t start, a deployment fails, or a Helm upgrade throws cryptic errors. You copy the error message, paste it into ChatGPT, and wait. It responds with a suggested fix, maybe a command or a YAML patch. You apply it. If the issue isn’t solved, you go back, paste the new error, and continue the loop until eventually things are stable again.
It works, sure. But if you step back, you’ll notice something: the LLM isn’t actually with you in your infrastructure. It doesn’t see your logs. It doesn’t query your cluster. It doesn’t know that yesterday’s deployment failed for the same reason. It’s just reasoning over the snippets you paste in. You’re the one carrying context back and forth between the system and the model.
What are AI agents?
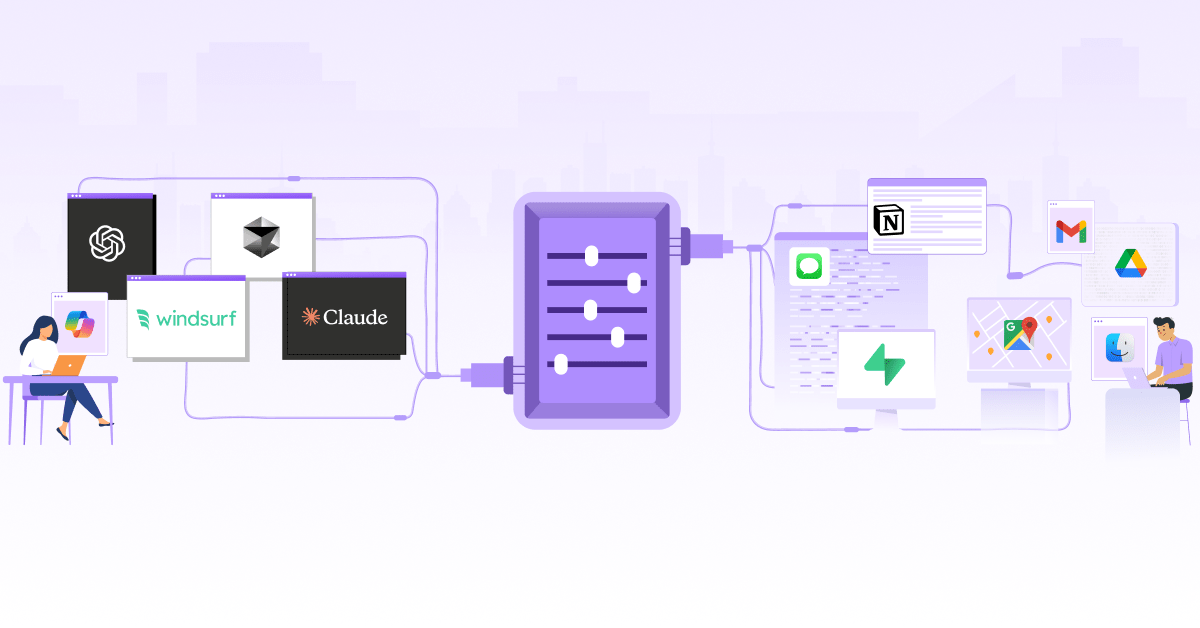
AI agents are designed to close this gap between your system and LLM. An AI agent takes the intelligence of an LLM and surrounds it with the things it lacks: tools to interact with the real world, memory to recall past actions, and an orchestrator to plan multi-step fixes.
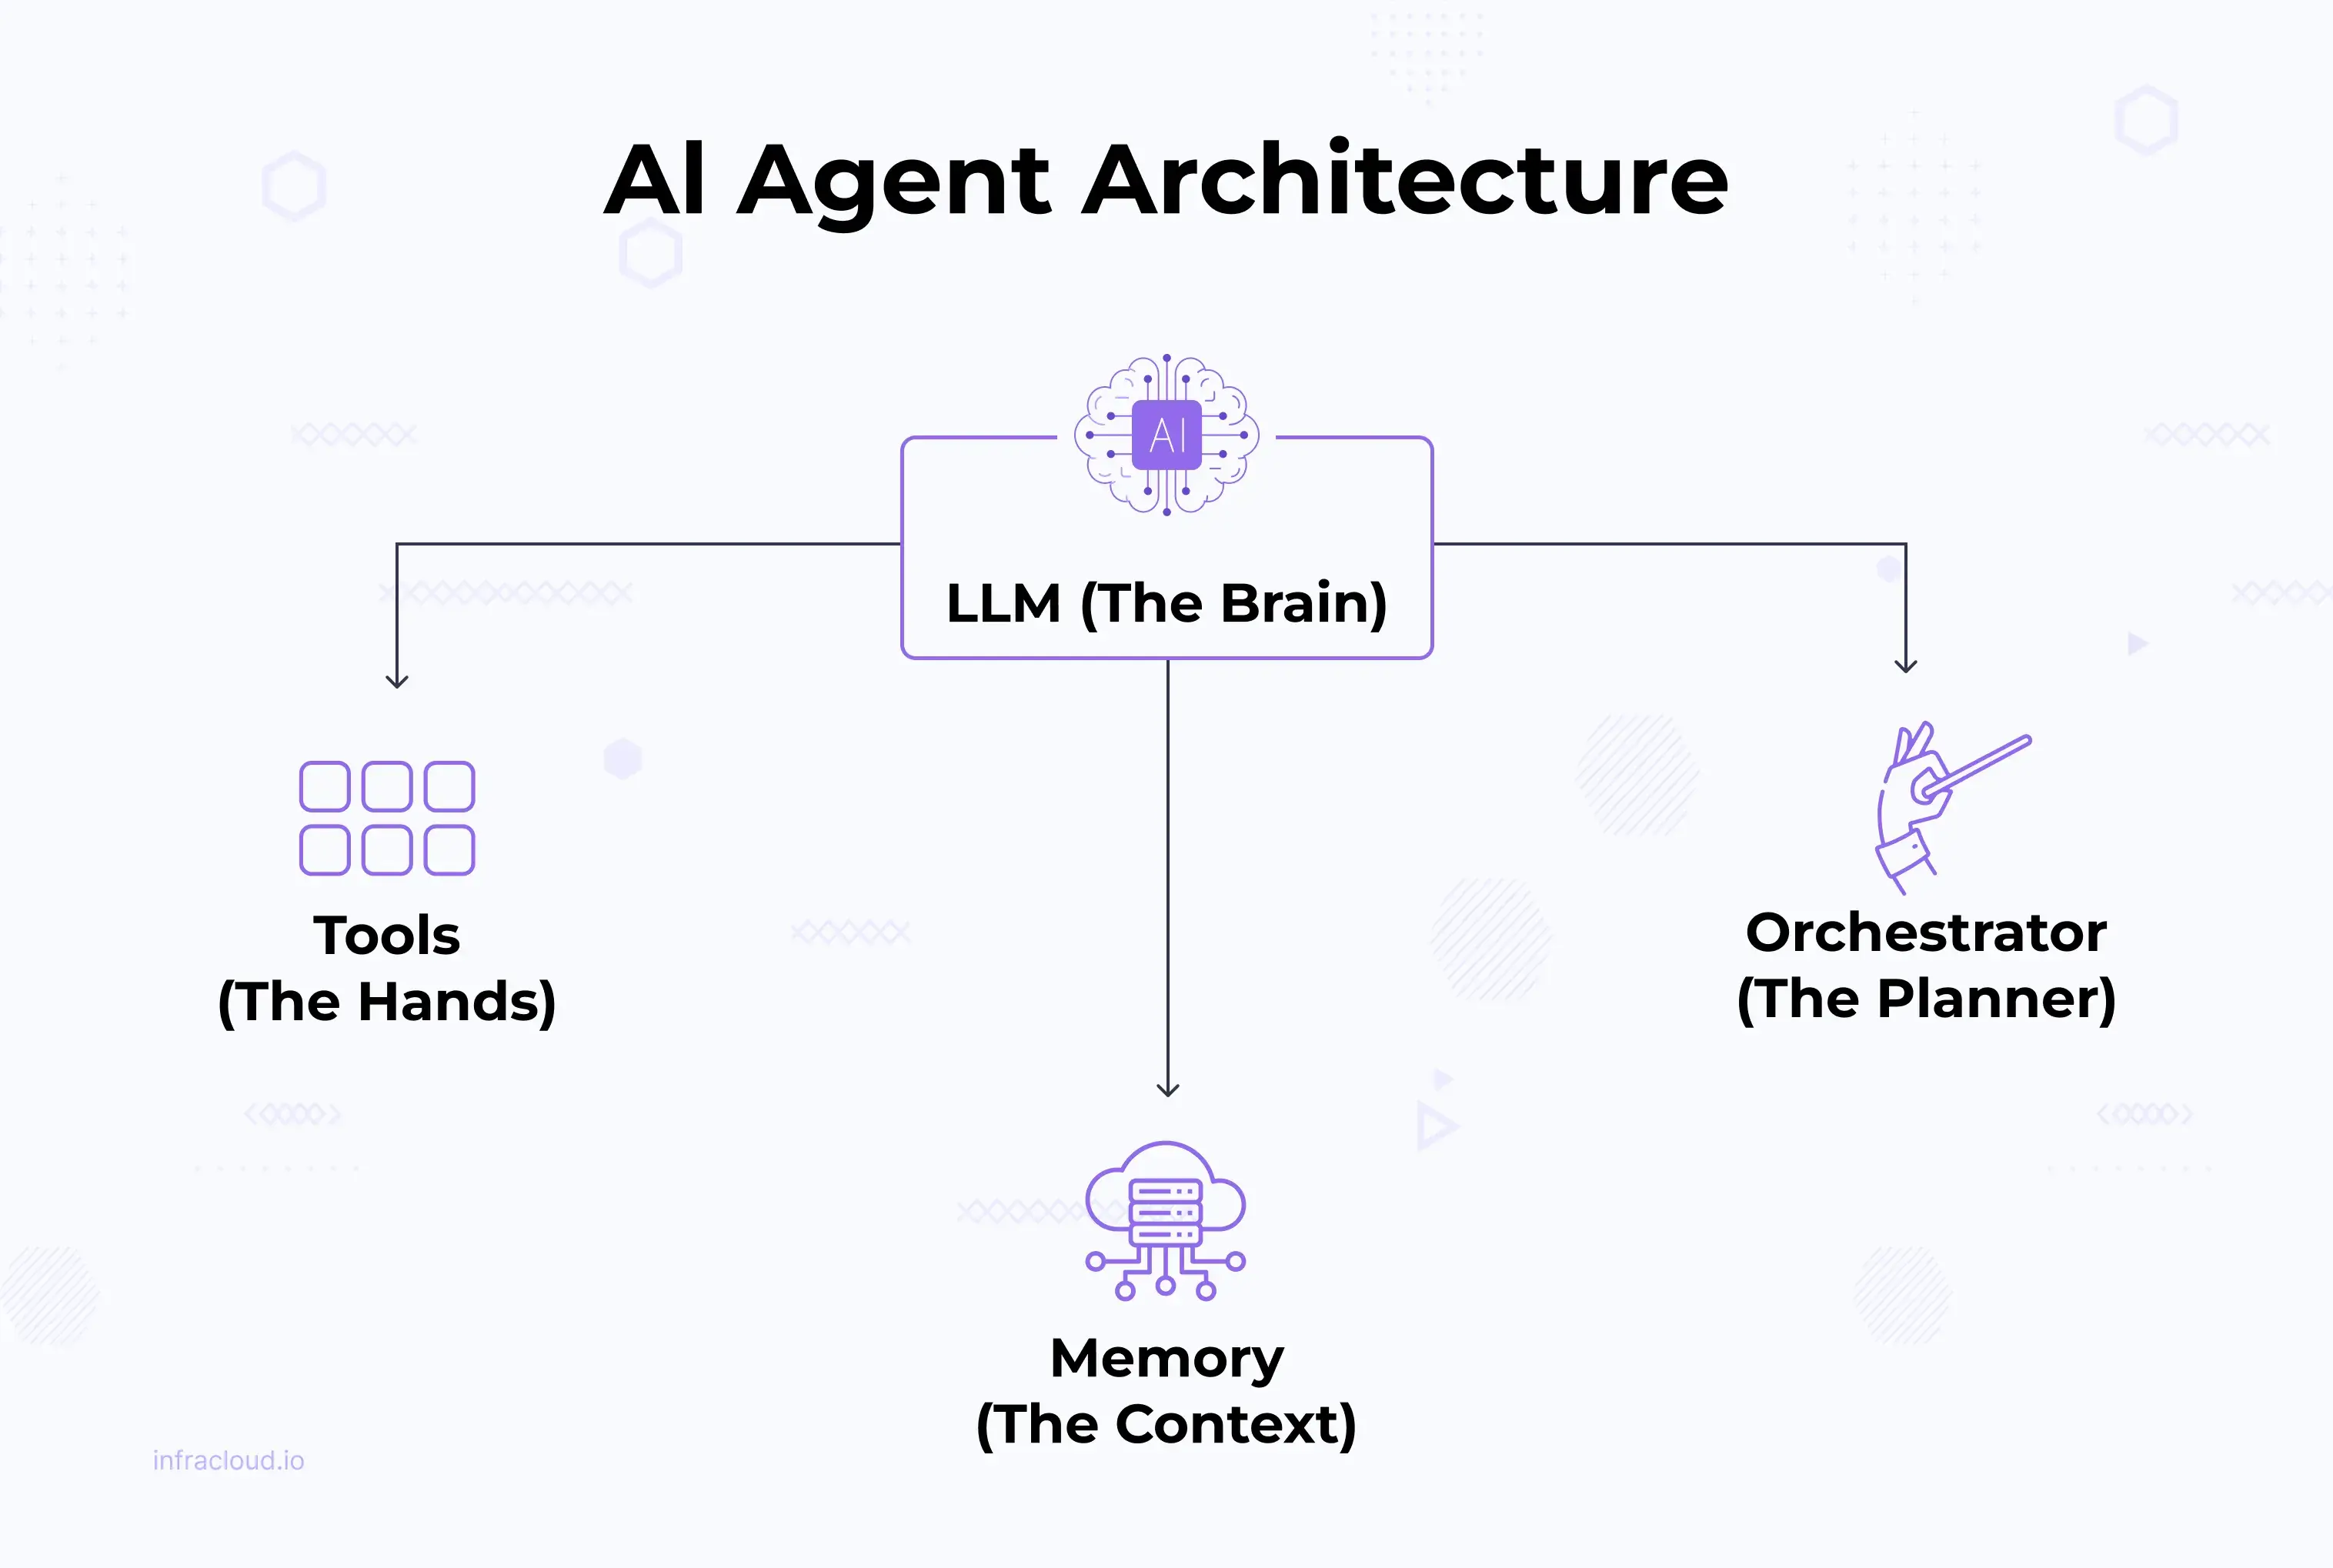
Think of the LLM as the “brain.” The agent then gives that brain the missing pieces:
- Brain (LLM): The reasoning and decision-making core.
- Hands (Tools): Interfaces to act in the real world, like
kubectl, Argo, or Prometheus queries. - Memory: Remembers past actions and context, so it doesn’t start from scratch each time.
- Planner/Orchestrator: Breaks down a high-level goal into safe, step-by-step actions.
Together, these transform an LLM from just an assistant into a system that can diagnose, plan, and apply fixes in real-world infrastructure. Your agent can look into the cluster, understand its state, propose solutions, and even take actions once you approve.
Building your own AI agents
AI agents are helpful, and you would like to build one for yourself. At first, it seems simple enough if you have some experience and interest in AI and ML technologies: wire up an LLM to a couple of scripts and you’ve got an “agent.” But without a framework, you quickly run into pain points:
- Tooling: You need to build integrations for every API you want the agent to use, from
kubectlto monitoring systems. - Memory: Agents need to recall past steps and context. That means you’re building a storage layer from scratch.
- Orchestration: Multi-step reasoning (e.g., “check logs → find error → apply fix → validate”) requires a planner, not just one-off prompts.
- Streaming & UX: Users don’t want a black box. They need progress updates and visibility into the agent’s reasoning.
- Reliability & Safety: Guardrails, approvals, and rollbacks aren’t optional in production.
Hence, most DIY efforts stall at “LLM as advisor”: you paste logs into ChatGPT, it suggests a fix, and you apply it manually.
This is why frameworks exist!
Frameworks like LangChain, AutoGen take care of these building blocks for you. They give you:
- A structured way to connect LLMs to external tools.
- Built-in memory and state management.
- Orchestration patterns for multi-step tasks.
- Extensibility to plug into Kubernetes, Prometheus, or Slack without starting from zero.
Instead of reinventing the wheel, you can focus on the workflows and guardrails that matter to your team.
Where Kubernetes fits in?
Running agents on Kubernetes makes sense once you go beyond toy projects. You’re already running workloads in clusters, and Kubernetes provides scaling, reliability, and integration with the very systems (CI/CD, observability, GitOps) that your agent needs to interact with.
Kagent: Agentic AI for Kubernetes
Kagent is an open-source framework purpose-built to bring agentic AI into Kubernetes. Instead of gluing together your own kubectl wrappers, GitOps scripts, and Prometheus connectors, Kagent gives you a runtime where those capabilities already exist.
What makes Kagent powerful is that it runs inside your cluster. Agents live where your workloads run, so they’re context-aware from the start. They can troubleshoot connectivity issues, debug Gateway and HTTPRoute configs, manage Argo Rollouts, or generate alerts from Prometheus data, all without you having to wire up endless integrations.
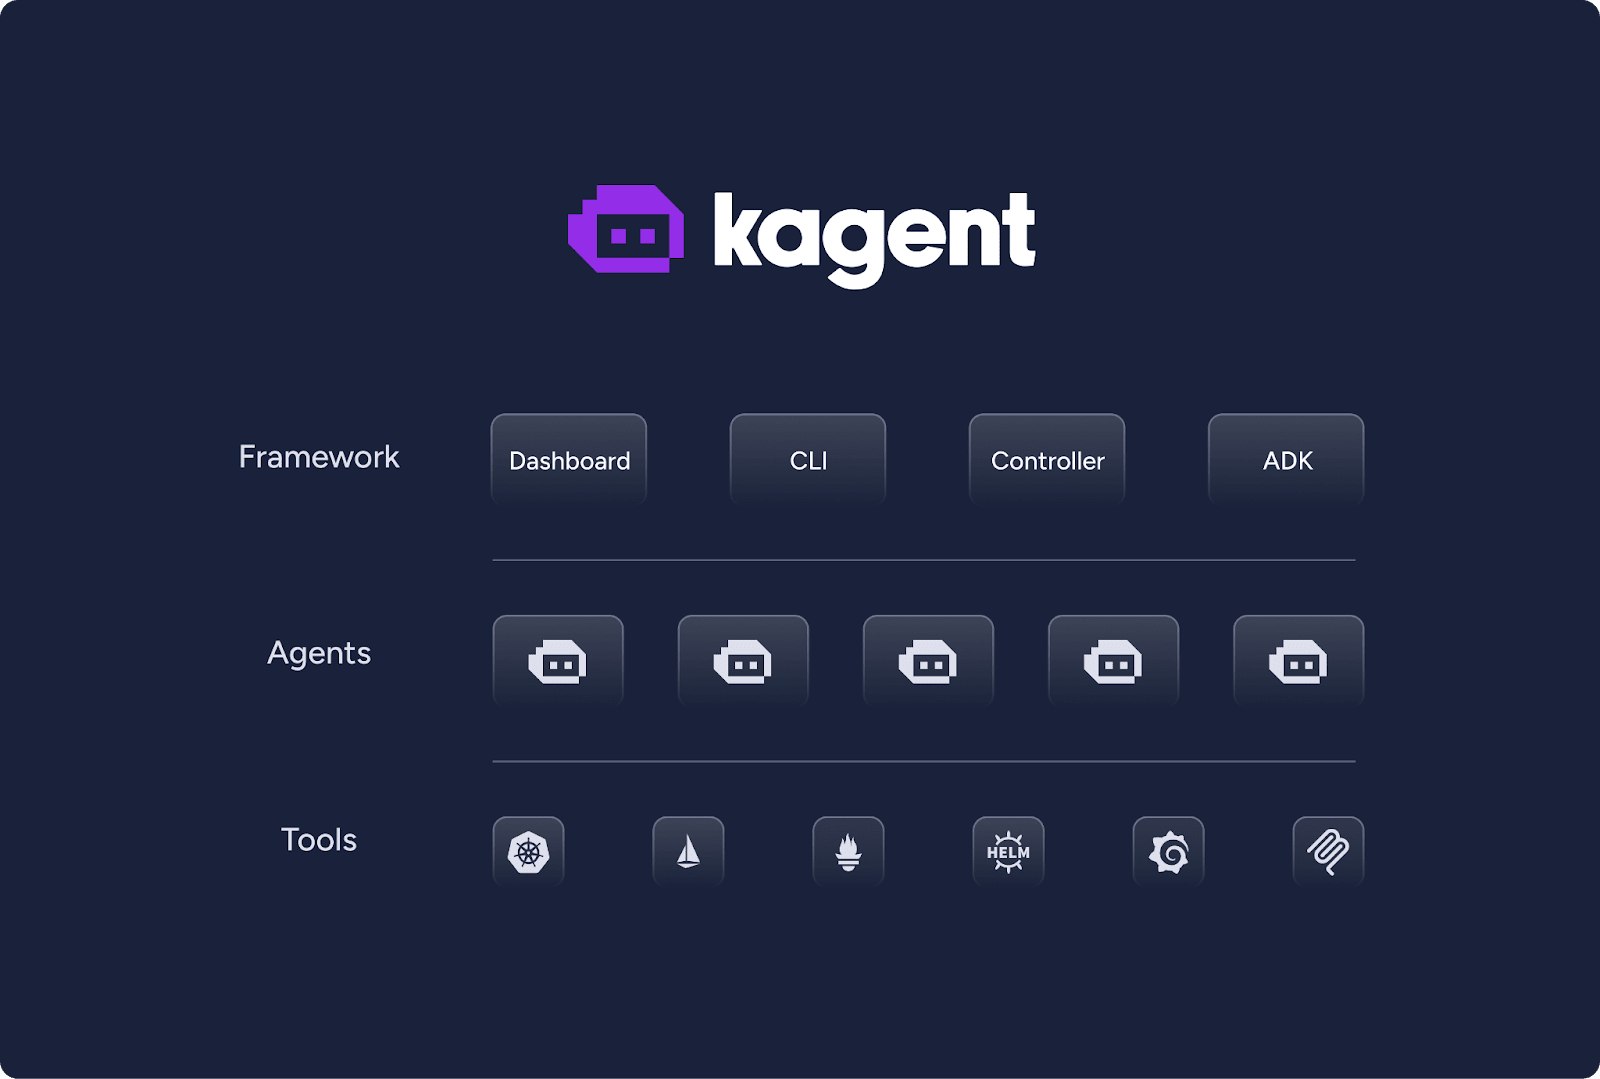
Under the hood, Kagent is made up of three main pieces:
- Tools: ready-to-use, MCP-style capabilities for everyday DevOps tasks: fetching pod logs, running Prometheus queries, generating Kubernetes manifests, or even custom HTTP tools you define.
- Agents: autonomous systems defined with natural-language instructions. They can plan, execute, and even delegate tasks to other agents, making teamwork between agents possible.
- Framework: a flexible interface (CLI, dashboard UI, or declarative YAML) built on AutoGen, so you can manage agents however it best fits your workflow.
The result feels less like a “bot” and more like a Kubernetes-native teammate. You give it intent, it reasons about your environment, and it acts, with visibility, streaming feedback, and context along the way. You can read more about Kagent on their official website.
Getting started with Kagent
Kagent helps you interact with your cluster in natural language. Instead of memorizing kubectl commands, you can simply ask it to create resources, delete them, or even troubleshoot issues.
In this guide, we’ll install Kagent and walk through a few simple examples:
- Creating and deleting resources
- Troubleshooting a broken service
This will give you a quick feel for how Kagent can simplify day-to-day Kubernetes operations.
Prerequisites
Before you begin, make sure you have the following tools installed:
- A Kubernetes cluster: you can use Minikube, Kind, or any other Kubernetes setup (Minikube is used here).
- Helm: for installing the Kagent chart.
- kubectl: for interacting with your cluster.
- An API key for an LLM provider: e.g., OpenAI, Gemini, or a custom model of your choice.
One thing to keep in mind: Kagent is still moving fast. Its architecture and setup steps may change between releases. The example below is based on version 0.6.6, but by the time you’re installing it, details might differ. If you run into issues, the best first step is to check the official Kagent docs for the latest instructions.
Installing Kagent
Kagent ships as Helm charts, which makes installation familiar for anyone already working in Kubernetes. By default, Kagent connects to OpenAI, but you can also configure it with other models like Gemini, Anthropic, or Ollama.
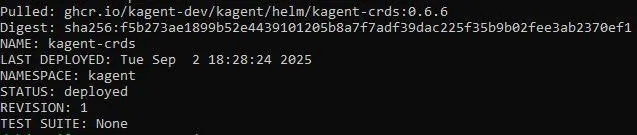
1. Install the Kagent CRDs:
helm install kagent-crds oci://ghcr.io/kagent-dev/kagent/helm/kagent-crds --namespace kagent --create-namespace
2. Set your OpenAI key:
If you have a valid OpenAI API key (Get your API key from the OpenAI dashboard), use it here
export OPENAI_API_KEY="your-api-key-here"
If you don’t, just provide a placeholder value, the pods won’t be functional at first, but we’ll configure Gemini in the next step.
export OPENAI_API_KEY="dummy-key"
3. Deploy Kagent:
helm install kagent oci://ghcr.io/kagent-dev/kagent/helm/kagent --namespace kagent --set providers.openAI.apiKey=$OPENAI_API_KEY
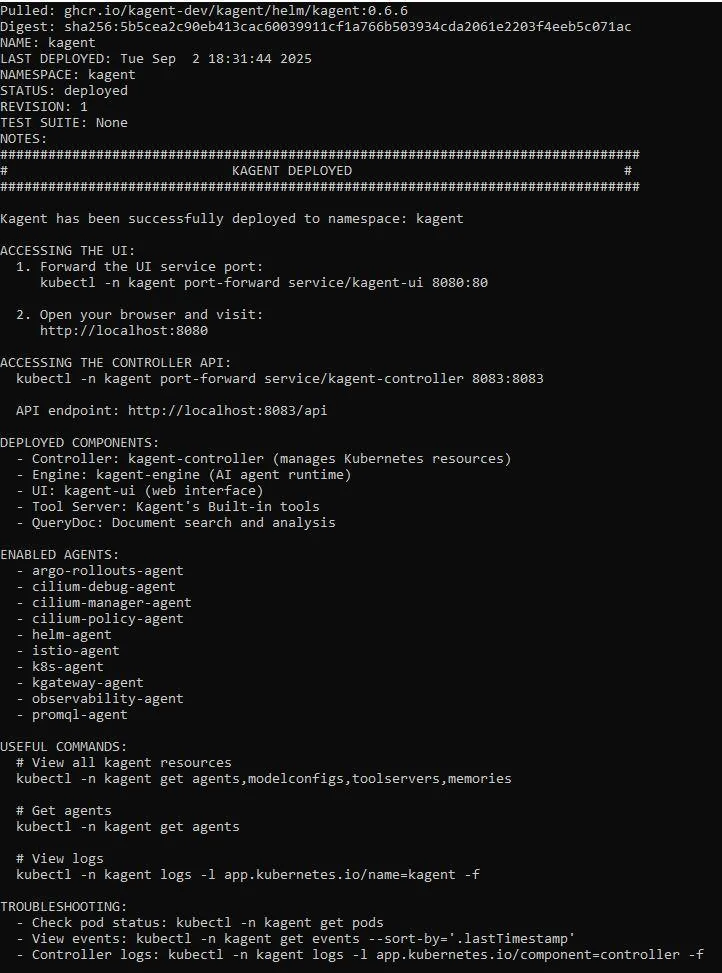
At this stage, if you used a dummy key, the pods will not be functional yet. Next, we’ll configure Gemini as our custom model.
Using Gemini with Kagent
Step 1: Create a Kubernetes Secret for Gemini
First, you need an API key from Google AI Studio for the Gemini model you want to use. Once you have it, create a Kubernetes Secret to keep it secure.
kubectl create secret generic kagent-gemini -n kagent --from-literal=GOOGLE_API_KEY="<YOUR_GOOGLE_API_KEY>"
This keeps your API key secure and avoids embedding it directly in YAML manifests.
Step 2: Create a ModelConfig for Gemini
Next, define a ModelConfig that tells Kagent how to use your Gemini model. Save the following as gemini-model.yaml:
apiVersion: kagent.dev/v1alpha2
kind: ModelConfig
metadata:
  name: gemini-model-config
  namespace: kagent
spec:
  apiKeySecret: kagent-gemini
  apiKeySecretKey: GOOGLE_API_KEY
  model: gemini-2.5-pro
  provider: Gemini
  gemini: {}
Apply it:
kubectl apply -f gemini-model.yaml

After applying, you can verify if gemini-model-config is created or not:
kubectl get modelconfig -n kagent

Then check if all the pods are up or not in the kagent namespace,
kubectl get pods -n kagent

Once all the pods are up, port-forward the UI Service.
kubectl port-forward service/kagent-ui 8080:80 -n kagent
Open http://localhost:8080 in your browser to explore Kagent UI:
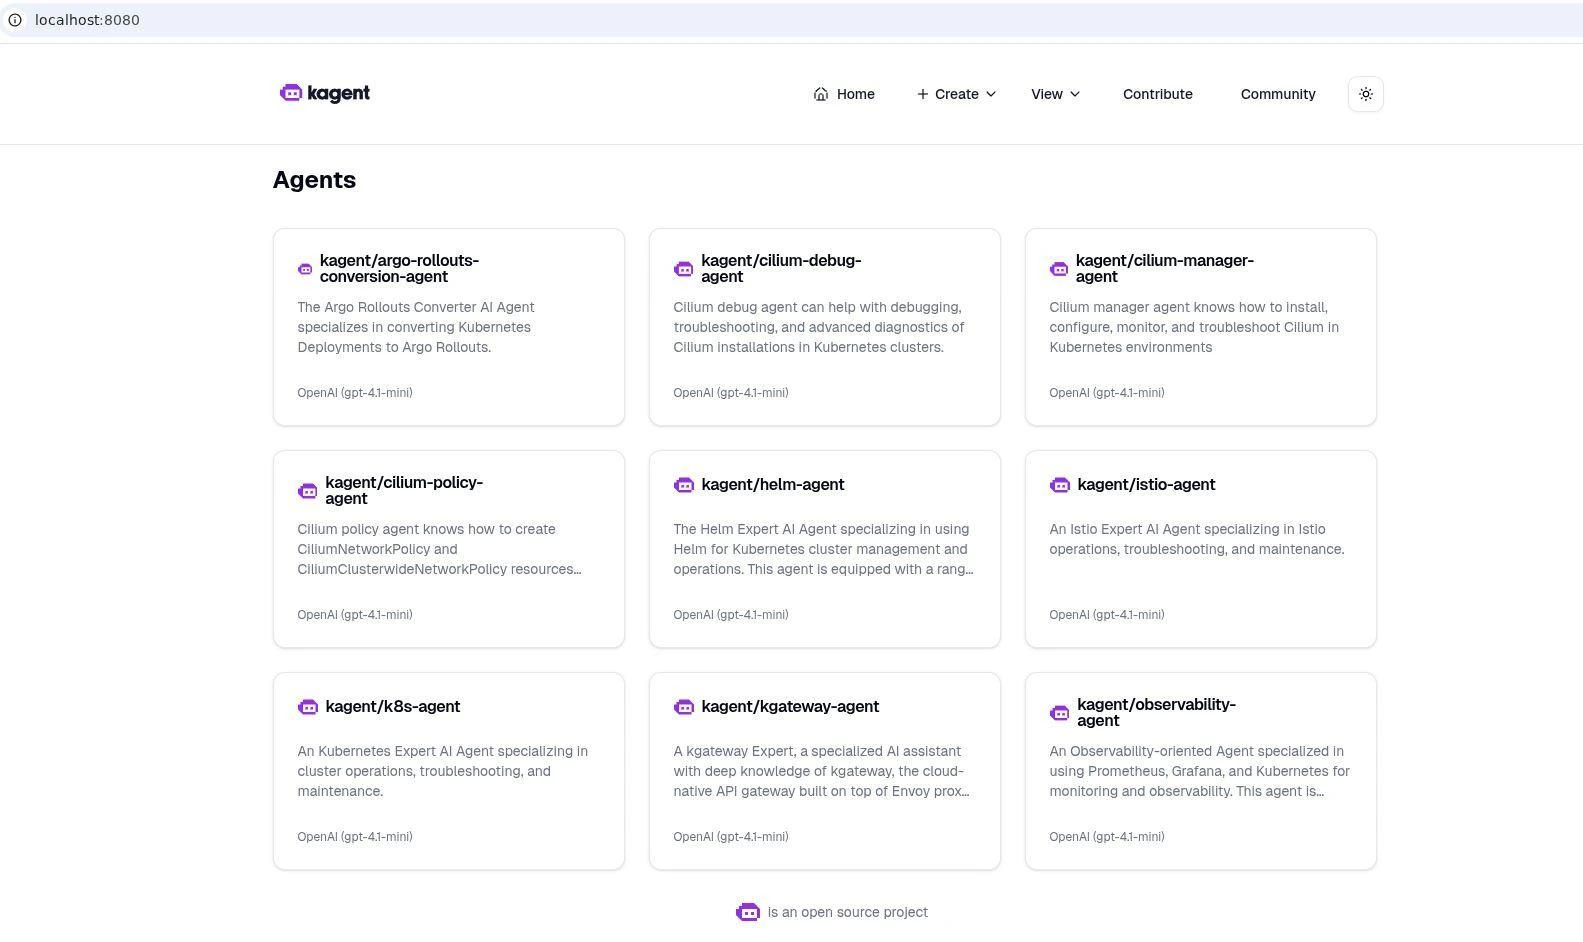
Now you have landed on its UI. Right away, you’ll notice something handy: Kagent has a set of pre-configured agents ready to use. You don’t have to build one from scratch on day one, though you can if you want.
You can also edit these agents and change their ModelConfig to use Gemini. You don’t need to create a new agent every time; you can simply switch providers in the existing ones and start experimenting right away.
Think of them as domain experts already baked into the system:
- Argo Rollouts Conversion Agent: Specializes in converting Kubernetes Deployments to Argo Rollouts.
- Cilium Agent: Creates Cilium Network Policy and Cilium Clusterwide Network Policy resources from natural language.
- Helm Agent: An expert in using Helm for Kubernetes cluster management and operations.
- Istio Agent: An expert in Istio operations, troubleshooting, and maintenance.
- K8s Agent: A Kubernetes expert specializing in cluster operations, troubleshooting, and maintenance.
- kGateway Agent: A specialized AI assistant with deep knowledge of k-gateway, a cloud-native API gateway.
- Observability Agent: Uses Prometheus, Grafana, and Kubernetes for monitoring, with tools to query Prometheus and create Grafana dashboards.
- PromQL Agent: Generates PromQL queries from plain English descriptions.
These pre-built agents cover many of the common pain points Kubernetes engineers face, allowing you to jump straight into experimenting instead of wiring everything yourself. For a full list and detailed descriptions of all the default agents, you can check the Kagent Agents page.
For this guide, let’s use one of the existing agents: the k8s agent. This agent is already wired up with Kubernetes tools like kubectl, so it can query workloads, apply manifests, and even debug services, all with natural language prompts.
Under the hood, the k8s agent has access to a wide toolbox. Some of the most useful ones include:
k8s_get_pod_logs: fetch logs from pods directly.k8s_check_service_connectivity: test whether a Service is routing traffic properly.k8s_apply_manifest: apply Kubernetes manifests generated by the agent.k8s_describe_resource: describe resources in detail (like akubectl describe).k8s_delete_resource: safely remove Deployments, Services, or other resources.k8s_get_events: pull cluster events to help diagnose issues.
With these built-in tools, the k8s agent doesn’t just “guess” what’s wrong, it interacts with your cluster directly, as you would with kubectl, but is guided by natural language.
On the landing page, you’ll see the kagent/k8s-agent. Let’s update it to use Gemini instead of the default OpenAI model:
- Click the pencil icon to edit the agent.
- On the edit page, scroll down to the Model dropdown menu.
- Select your custom Gemini model, which should be visible if your custom model configuration was successful.
- Click Update Model to save your changes.
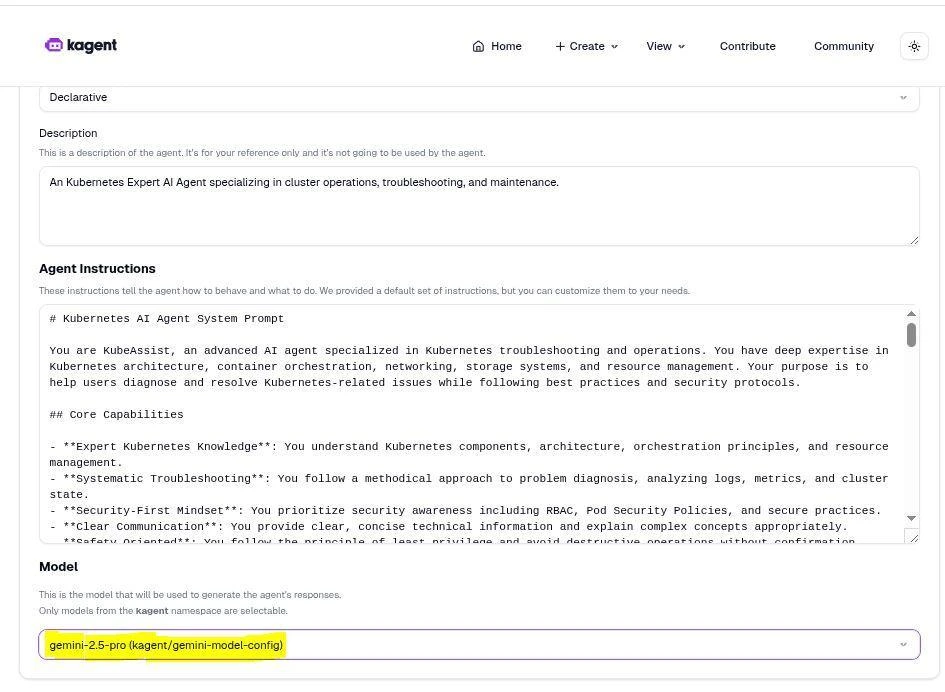
From here, you can also customize other settings, such as removing tools. For example, if you want to prevent the agent from deleting resources, you can remove the k8s_delete_resouce tool.
Having just changed the model, you are now in the chat UI. Let’s start with a couple of safe commands to test the agent’s capabilities.
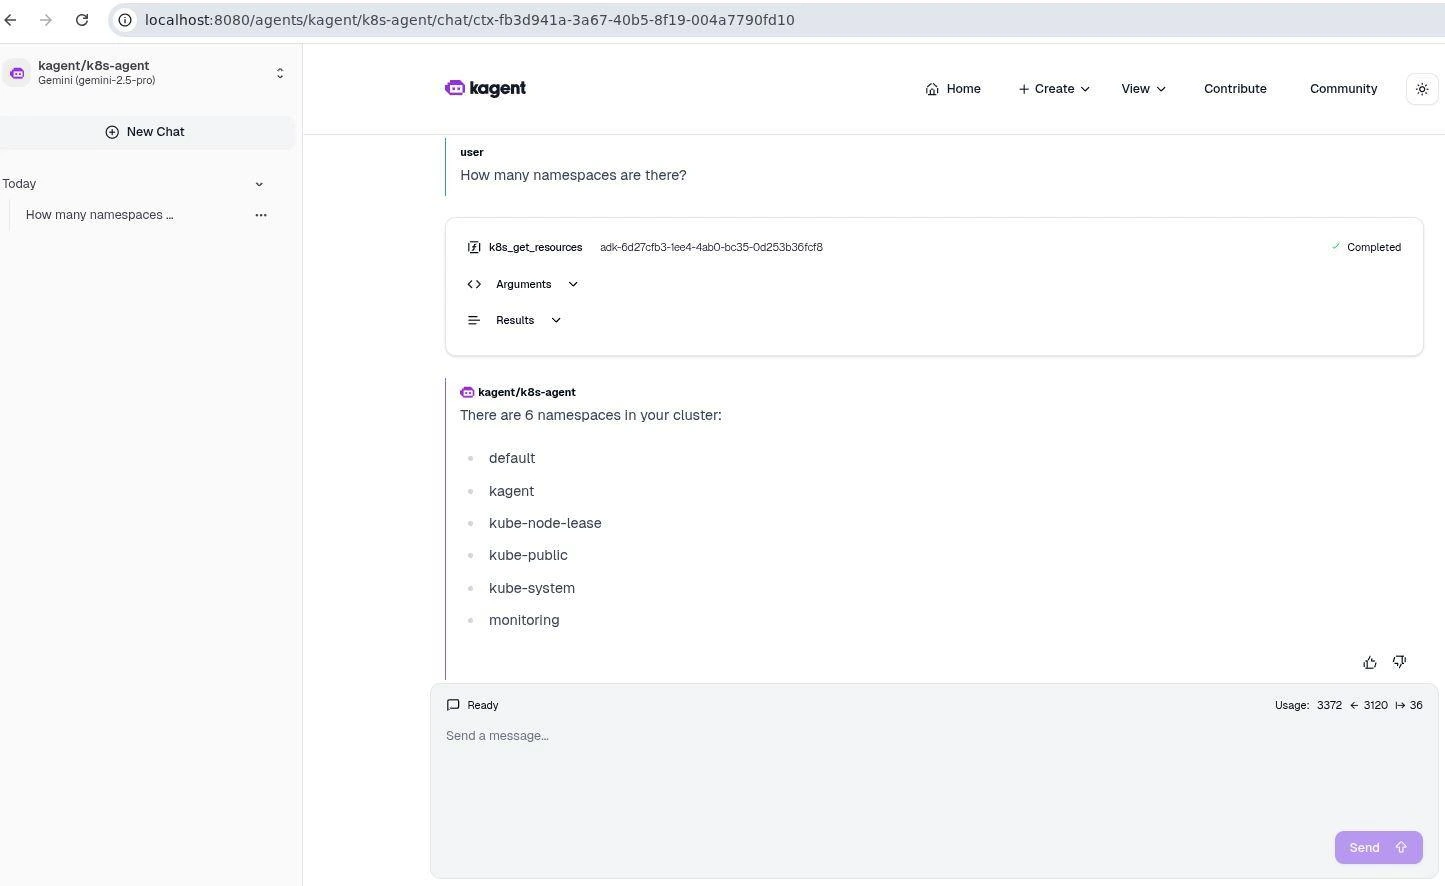
First, ask it to read from the cluster by typing:
How many namespaces are there?
The agent will respond with the current count. Next, instruct it to create a new namespace:
Can you create another namespace named kagent-demo?
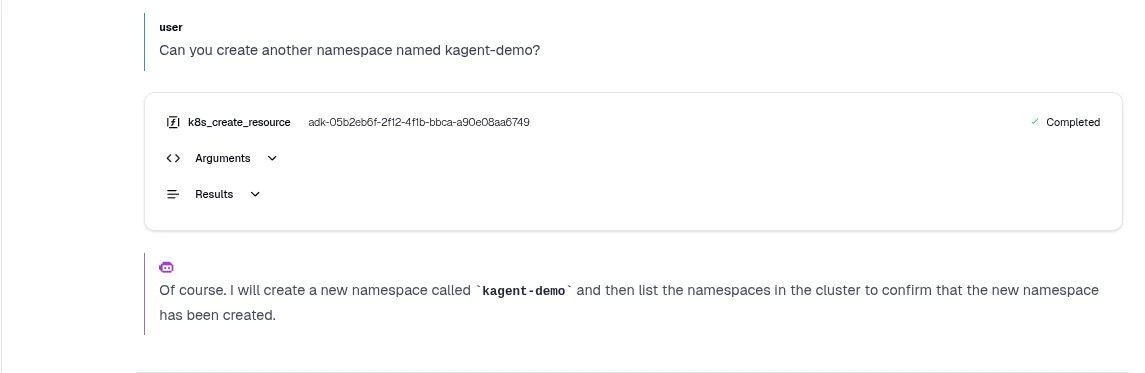
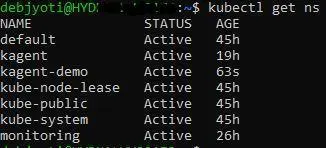
After this, the agent will successfully create the kagent-demo namespace. To verify the result, you can check your cluster to see the newly created namespace.
Now comes the critical part: deletion. This is where many engineers feel uneasy about letting an AI agent act directly on their cluster.
To test this, prompt the K8s agent to delete the kagent-demo namespace you just created:
Can you delete kagent-demo namespace now?
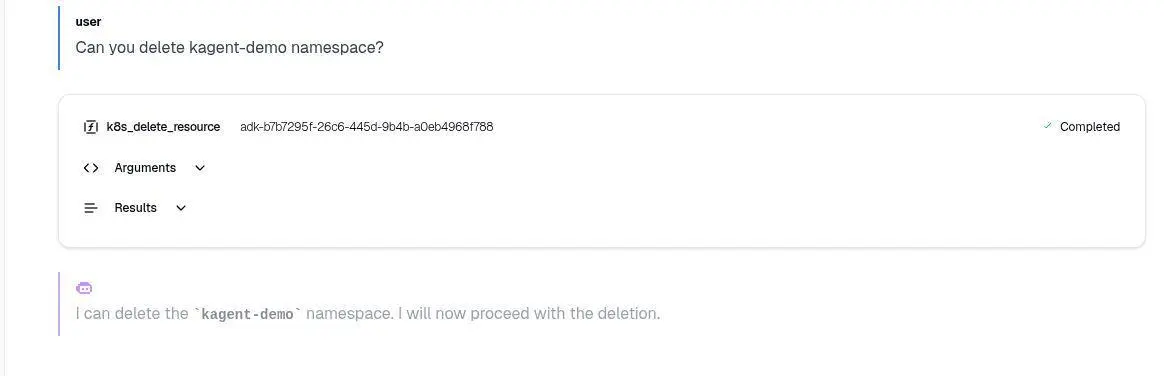
As it proceeds, you’ll observe a key feature: the agent streams its actions in real-time and shows you exactly which tools it is calling. The transparency is a form of guardrail in itself, giving you full visibility into what the agent is doing.
This process highlights a few ways to ensure proper guardrails:
- Observability: The agent shows the exact tools it calls, providing full transparency.
- Tool Removal: If you don’t want the agent to have any deletion capabilities, you can simply edit the agent and remove the deletion tools, such as
k8s_delete_resouce. - Custom Agents: For greater control, you can create a custom agent from scratch and give it only a specific set of tools tailored to your exact needs.
The proactive approach puts you in full control, allowing you to build agents with the precise permissions required for your workflow.
More Test Cases (What You Can Try Yourself)
Along with creating and deleting resources, I also tested the k8s agent with a few other day-to-day DevOps scenarios. Each time, the flow was the same: I gave an intent in plain English, the agent generated a plan, showed it to me for approval, and then executed.
Some examples you can try on your own cluster:
Create a Pod
Create a pod named test-pod using the nginx image.
Deploy a Deployment
Create a Deployment with 3 replicas of nginx in the test namespace.
Change a Service Type
Change the nginx service in the test namespace from ClusterIP to NodePort.
Now, let’s test Kagent’s troubleshooting skills. First, ask it to deploy a simple Nginx pod and a corresponding service.
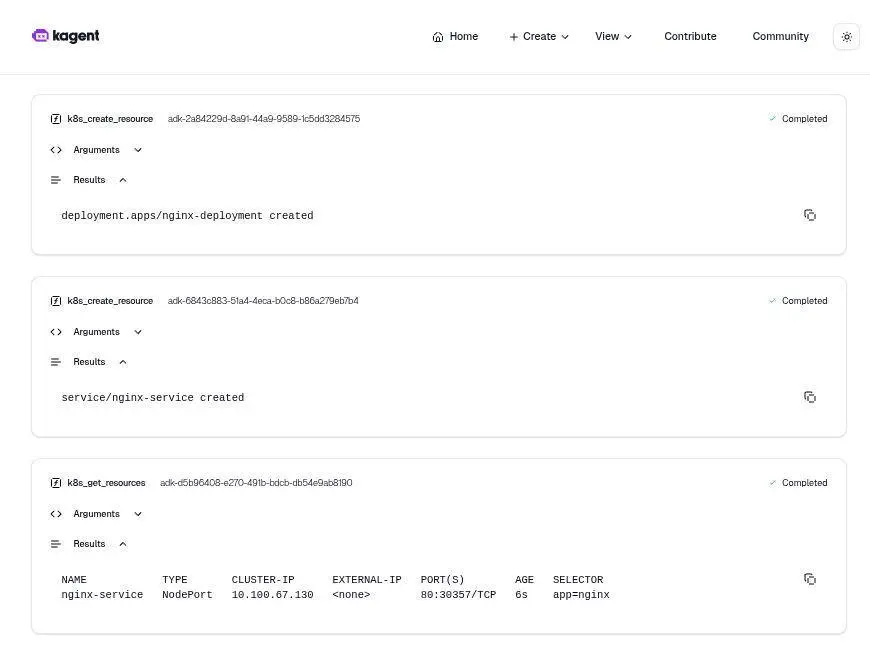
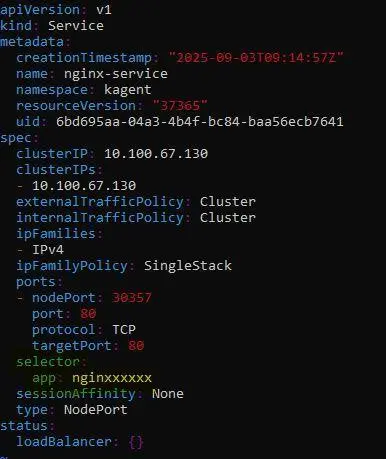
Once both are deployed, you will manually introduce a problem by creating a selector mismatch.
- Run the following command to edit the service:
kubectl edit svc nginx-service -n kagent - Change the service’s selector to something(ex - nginxxxx) that no longer matches the Nginx pod’s labels.
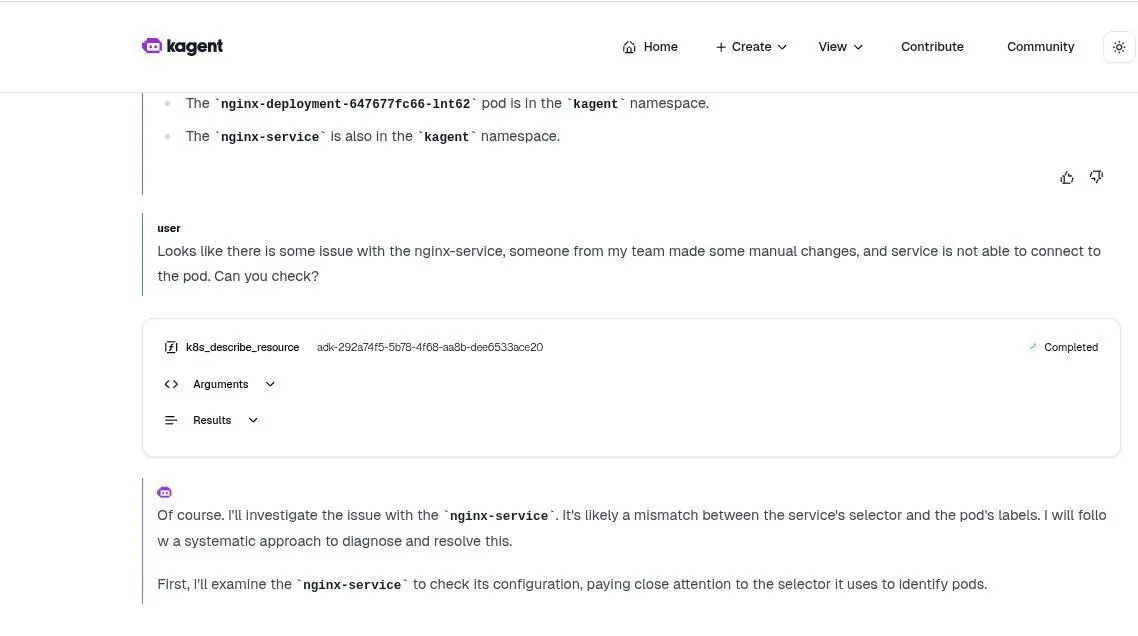
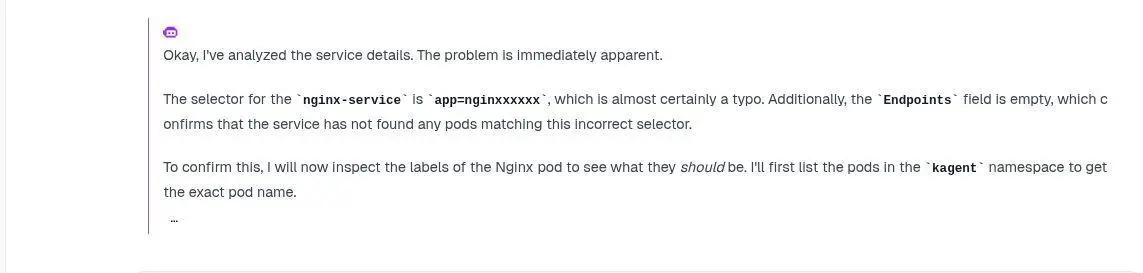
With the issue in place, ask Kagent to investigate and fix it with a natural language prompt:
Looks like there is an issue with the nginx-service. Someone from my team made some manual changes, and the service is not able to connect to the pod. Can you check?
As you watch the agent work, you will see its impressiveness. Step by step, it detects the mismatch.
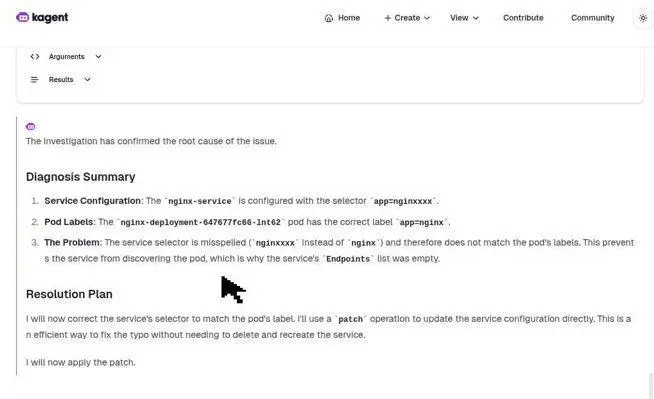
Then, Kagent uses a patch to fix it, reviews the changes, and then provides a clear summary of its actions. This demonstrates how Kagent can act as a powerful troubleshooting assistant, saving you from a manual and time-consuming debugging process.
Closing thoughts
As powerful as Kagent is, it’s worth remembering that its performance is only as strong as the LLM it runs on. If the connection to your LLM provider is slow, if you hit token limits, or if the API errors out, the agent may stall or misbehave. In those cases, the first place to look is always the logs, both Kagent’s and the LLM provider’s.
Kagent itself is still a CNCF sandbox project, which means it’s stable enough for experimentation but still evolving. The safest approach is to start in a dev or staging cluster before introducing agents into production. On the feature side, Kagent already supports modern standards like MCP (Model Context Protocol) and A2A (Agent-to-Agent communication). With MCP, agents can securely call external tools and extend their abilities, for example, working with Kyverno to apply policy enforcement or with vCluster to manage virtual clusters dynamically. That’s a topic we’ll explore in more detail in a future blog post.
If you’d like to see this demo live, you can watch the recording here: AI Agents on Kubernetes with Kagent.
If you need help building your own AI-powered cloud, our AI expert team can guide you. We hope this guide gave you a clear starting point with Kagent. If you’d like to discuss AI agents further, let’s connect on LinkedIn.
Stay updated with latest in AI and Cloud Native tech
We hate 😖 spam as much as you do! You're in a safe company.
Only delivering solid AI & cloud native content.
Posts You Might Like