Setup RabbitMQ in HA Mode using Kubernetes Operator

Organizations are moving from monolithic architecture (where all the code building the application exists as a single, monolithic entity) to microservices architecture as it simplifies app management, making it easier to build, deploy, update, test and scale each service independently without affecting other parts of the architecture.
When the application is built in a microservice architecture pattern, the idea is to develop a single application consisting of two or more small services (microservices). Each microservice is independent, and the application is the sum of all the microservices.
There are different ways to communicate with microservices, such as:
- Brokers (eg. RabbitMQ)
- Remote Procedure Calls (RPC)
- REST APIs
How Microservices communicate?
We have two ways to communicate between microservices:
- Synchronous: Each service calls the other microservice, directly. But, this results in dependency between the services.
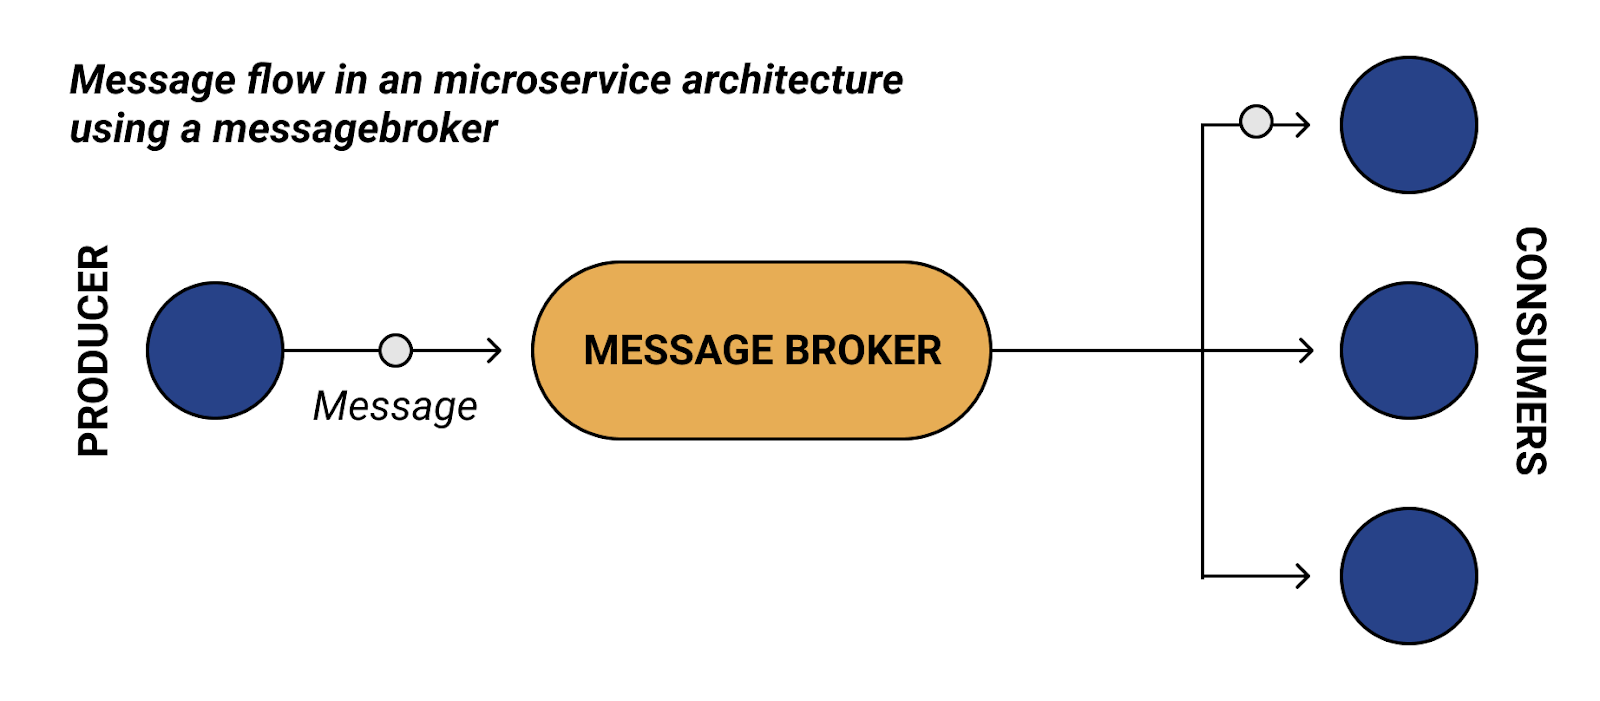
- Asynchronous: Let’s say there are two services, Service A and Service B, and you have some central hub or message broker. Here, the two services will act asynchronously. Service A publishes the message in the message queue, and Service B receives the message from the queue. If somehow, Service B is not working, or down due to connectivity issues, the messages will be stored in the queue and once Service B is up and running it will start receiving messages. Until then, the rest of the application will continue operating as usual.
There are several message brokers available in the market which developers are using in their microservice architecture like RabbitMQ, Apache Kafka etc. In this blog post, we will be discussing RabbitMQ.
What is RabbitMQ?
RabbitMQ is an open source message broker. Message broker is a software that enables communication and information exchange between systems, applications and services. They serve as intermediaries between other applications, allowing senders to issue messages without knowing where the receivers are, whether they are active or not, or how many of them are there. RabbitMQ gives your applications a common platform to send and receive messages. And your messages have a safe place to live until they are processed.
Features of RabbitMQ
- Clustering - A RabbitMQ cluster is a logical grouping of one or several nodes, each sharing users, virtual hosts, queues, exchanges, bindings, runtime parameters and other distributed state.
- High Availability.
- Supports several official client libraries for various languages like Java, PHP, Go, Ruby, Python.
- Provides Web-UI for management and HTTP API for monitoring.
- Supports multiple messaging protocols.
Queues in RabbitMQ - Classic vs Quorum
Classic Queues or mirrored queues work with a single leader queue and one or more mirror queues. All reads and writes go through the leader queue, which replicates all the commands (write, read, ack, nack, etc.) to the mirrors. Once all the live mirrors have the message, the leader will send a confirmation to the publisher. Mirroring parameters are configured using policies. A policy matches one or more queues by name (using a regular expression pattern) and contains a definition (a map of optional arguments) that are added to the properties of the matching queues.
Quorum Queues is a replicated queue to provide high availability and data safety. It uses the algorithm of Raft protocol and helps us achieve higher throughput. Each queue is a replicated queue, it has a leader and multiple followers. Clients (publishers and consumers) always interact with the leader, which then replicates all the commands (write, read, ack, etc.) to the followers.
At the time of writing this post, each newly created queue is of classic type. Consider using quorum queues if you are creating new ones, as classic/mirrored queues might get deprecated in later versions.
Managing RabbitMQ using Kubernetes operators
To manage creation, modification & deletion of queues & various other components, RabbitMQ provides us with two Kubernetes operators namely Cluster Kubernetes Operator and Messaging Topology Kubernetes Operator.
- RabbitMQ Cluster Kubernetes Operator: It automates provisioning, management, and operations of RabbitMQ clusters running on Kubernetes. Thus providing us with a consistent and easy method of deployment. These clusters when deployed using the operator can be used by applications running on Kubernetes or outside of Kubernetes.
- RabbitMQ Messaging Topology Kubernetes Operator: It is used with RabbitMQ clusters deployed via the RabbitMQ Cluster Kubernetes Operator. A Messaging topology is the collection of objects such as exchanges, queues, bindings and policies that provides specific messaging or streaming scenarios.
Why HA mode?
RabbitMQ offers features of High Availability (HA). High availability refers to automated failover from one instance to another in case of disk failure or a limited network outage. The impact of failure on availability should be very minimal or should not be seen. Implementation of RabbiMQ in HA mode is advised so that if any of the nodes fails or gets terminated, there is no loss of information and all the queues are intact. This HA mode setup is only required if you want to have replicated queues. If you are creating quorum queues, then you don’t need to do anything extra for HA.
Let us see how we can set up RabbitMQ using Kubernetes operator, along with a policy for HA.
Installation steps
Cluster Operator Installation using Helm Chart.
We will first install the latest version of Cluster Operator using Bitnami Helm chart. Run the following command:
helm repo add bitnami https://charts.bitnami.com/bitnami
helm install rabbitmq-cluster-operator bitnami/rabbitmq-cluster-operator -n rabbitmq-system --create-namespace
Once we run helm install, a bunch of resources get created in the Kubernetes cluster.
- A new namespace rabbitmq-system. Cluster Operator and Messaging Topology Operator gets installed in this namespace.
- Custom resource rabbitmqcluster.rabbitmq.com gets created.
- ServiceAccount and few RBAC Roles get created.
Now run the below command to see the resources deployed in rabbitmq-system namespace:
kubectl get all -n rabbitmq-system
Output:
NAME                                             READY   STATUS    RESTARTS   AGE
pod/rabbitmq-cluster-operator-587f65b9c4-6qp2t   1/1     Running   0          45m

NAME                                        READY   UP-TO-DATE   AVAILABLE   AGE
deployment.apps/rabbitmq-cluster-operator   1/1     1            1           45m

NAME                                                   DESIRED   CURRENT   READY   AGE
replicaset.apps/rabbitmq-cluster-operator-587f65b9c4   1         1         1       45m
RabbitMQ cluster provisioning
Since the operator is installed, we will deploy a RabbitMQ cluster. Create a file rabbitmq-cluster.yaml with below contents:
apiVersion: rabbitmq.com/v1beta1
kind: RabbitmqCluster
metadata:
 name: rabbitmqcluster-prod
spec:
 replicas: 3
 resources:
   requests:
     cpu: 500m
     memory: 1Gi
   limits:
     cpu: 1
     memory: 2Gi
 rabbitmq:
         additionalConfig: |
                 log.console.level = info
                 channel_max = 1700
                 default_user_tags.administrator = true
 service:
   type: ClusterIP
kubectl apply -f rabbitmq-cluster.yaml
Output:
rabbitmqcluster.rabbitmq.com/rabbitmqcluster-prod created
Once we run the above command, we will see that three replicas of RabbitMQ will spin up.
kubectl get all --selector app.kubernetes.io/name=rabbitmqcluster-prod
Output:
pod/rabbitmqcluster-prod-server-0   1/1     Running   0          2m56s
pod/rabbitmqcluster-prod-server-1   1/1     Running   0          2m56s
pod/rabbitmqcluster-prod-server-2   1/1     Running   0          2m56s
service/rabbitmqcluster-prod         ClusterIP   10.96.101.26   <none>        5672/TCP,15672/TCP,15692/TCP   2m56s
service/rabbitmqcluster-prod-nodes   ClusterIP   None           <none>        4369/TCP,25672/TCP             2m56s
statefulset.apps/rabbitmqcluster-prod-server   3/3     2m56s
rabbitmqcluster.rabbitmq.com/rabbitmqcluster-prod   True               True               2m56s
When we install RabbitMQ using operator, a Secret is being created by default.
kubectl get secret | grep rabbitmq
Output:
rabbitmqcluster-prod-default-user         Opaque                                7      4m49s
rabbitmqcluster-prod-erlang-cookie        Opaque                                1      4m49s
rabbitmqcluster-prod-server-token-47x9k   kubernetes.io/service-account-token   3      4m49s
The secret rabbitmqcluster-prod-default-user is having the credentials for accessing the web UI. Decode the username and password using base64 decoder using the below commands:
kubectl get secret rabbitmqcluster-prod-default-user -o jsonpath='{.data.username}' | base64 --decode
kubectl get secret rabbitmqcluster-prod-default-user -o jsonpath='{.data.password}' | base64 --decode
Lets access the rabbitmq UI on browser:
kubectl port-forward svc/rabbitmqcluster-prod 15672:15672
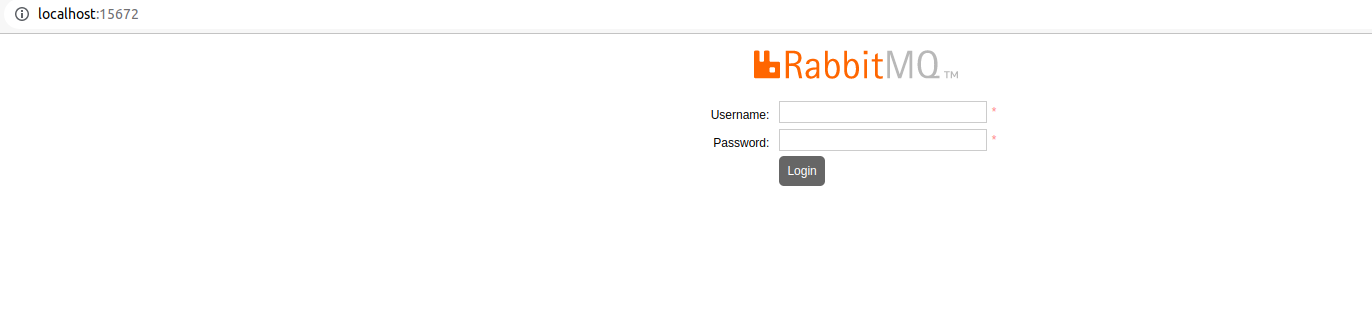
We will port forward the service on the port number 15672. Navigate to the browser and access the UI on http://localhost:15672. Login using the credentials you got from the above steps.
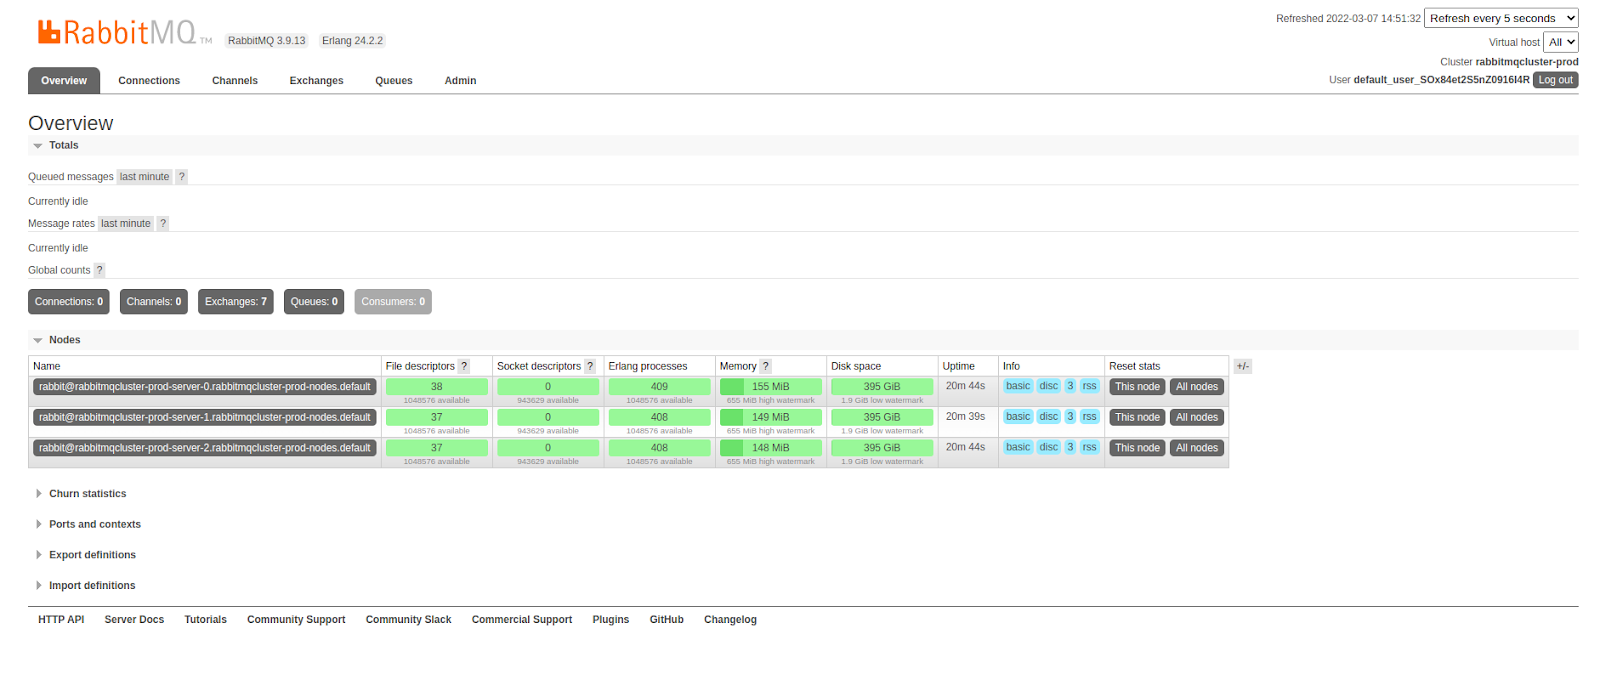
Once we login, we will see the dashboard. The web UI of RabbitMQ is user friendly interface that will enable us to view and handle the queues, connections, channels, exchanges, users and user permissions from the browser itself. We can also monitor message rates and send/receive messages manually.
HA policy using Messaging Topology Operator
The RabbitMQ setup is up and running with three replicas. The replication is not happening in the case of RabbitMQ classic queues. If a node terminates, the queues will be lost. Hence, we need to implement the HA mode.
For implementing HA mode, we will create a policy, we can run a command manually inside the pod or create a policy configuration file. The Bitnami Helm Chart we installed at the top also installs this Messaging Topology Operator.
We will create a policy config file ha-policy.yaml:
apiVersion: rabbitmq.com/v1beta1
kind: Policy
metadata:
  name: ha-policy
  namespace: default
spec:
  name: transient # name of the policy
  vhost: "/" # default to '/' if not provided
  pattern: "" # regex used to match queues and exchanges
  applyTo: "all" # set to 'queues', 'exchanges', or 'all'
  definition:
    ha-mode:
     all
    ha-sync-mode:
     automatic
  rabbitmqClusterReference:
    name: rabbitmqcluster-prod #name of the rabbitmqcluster
kubectl apply -f ha-policy.yaml
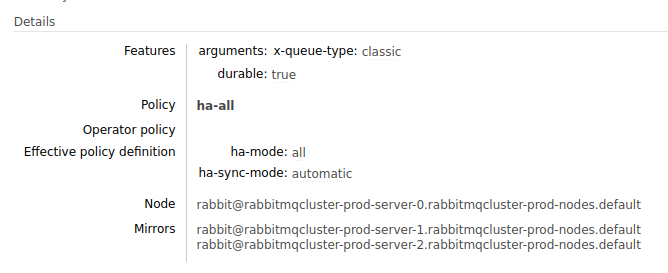
To verify that the queues are mirrored, navigate to Queues in the web UI and click on any queue. You will see two other RabbitMQ nodes names as shown in the screenshot below, which means the queue is mirrored.
You can refer to the examples directory of Messaging Topology Operator to add other objects for RabbitMQ based on your requirement.
Conclusion
It is highly recommended to make sure that the queues that we have in production are replicated properly to ensure availability of data. If you are looking for a reliable message broker, RabbitMQ is a good option. You can find a lot of documentation and support from RabbitMQ community. Hope this blog post was helpful. You can checkout few reference links mentioned below:
That’s all for this post. If you are working with RabbitMQ or plan to use it and need some assistance, feel free to reach out to me via LinkedIn. We’re always excited to hear thoughts and feedback from our readers!
Looking for help with Kubernetes adoption or Day 2 operations? do check out how we’re helping startups & enterprises with our Kubernetes consulting services and capabilities.
Stay updated with latest in AI and Cloud Native tech
We hate 😖 spam as much as you do! You're in a safe company.
Only delivering solid AI & cloud native content.
Posts You Might Like