Build APIs in less than 5 minutes with Strapi

This is an updated version of the original post authored by Omkar Joshi.
The evolution of CDN (Content Delivery Networks) and business need to scale multi-channel ways of interacting with the customer have made the traditional CMS obsolete. Organizations are using JAMstack to build responsive websites & CDN to deliver them where the customer is. With the evolution of the 5G and data-intensive applications such as AR, VR, drones, etc. new technologies will emerge that will deliver services closest to where the customer resides.
One of the key components in this JAMStack based architecture is a headless CMS system. Strapi is an open-source headless CMS framework to build APIs with minimum efforts and in almost no time. In this tutorial, we will build a simple headless CMS with Strapi and create API endpoints in less than 5 minutes. In the next tutorial, we will explore GraphQL and how to use it with Strapi. So, let’s get started with Strapi.
Pre-requisites
You will need the NodeJS version 12.x, NPM version 6.x and MongoDB > 3.6 installed on your machine if you plan to follow along with the tutorial. You can use Docker image for Mongo or run it locally. Strapi also supports MariaDB, MySQL, and PostgreSQL but as of this writing, MongoDB is supported as a first-class citizen. Therefore, for the scope of this article, we’ll stick to MongoDB. Strapi works well with MacOS and Linux based operating systems and for Windows, it has some support via WSL.
Creating The First Project using Strapi
Once the node and NPM is setup, we’re ready to create our very first project using Strapi. Create the project by running npx create-strapi-app:
$ npx create-strapi-app mongoose-project
npx: installed 84 in 12.217s
Creating a new Strapi application at /home/omkar/strapi/mongoose-project.

? Choose your installation type Custom (manual settings)
? Choose your default database client mongo
? Database name: mongoose-project
? Host: 127.0.0.1
? +srv connection: false
? Port (It will be ignored if you enable +srv): 27017
? Username: strapiuser
? Password: *******
? Authentication database (Maybe "admin" or blank):
? Enable SSL connection: No
Select the appropriate options. In this case, I’ve selected a custom installation with MongoDB as the database. Since MongoDB is running locally on my machine, the host IP is that of the localhost and other configurations are defaults. Setup will proceed and connect to MongoDB:
Creating a project with custom database options.
Creating files.
Dependencies installed successfully.

Your application was created at /home/omkar/strapi/mongoose-project.

Available commands in your project:

  npm run develop
  Start Strapi in watch mode.

  npm run start
  Start Strapi without watch mode.

  npm run build
  Build Strapi admin panel.

  npm run strapi
  Display all available commands.

You can start by doing:

  cd /home/omkar/strapi/mongoose-project
  npm run develop
Let’s change the directory to the newly created project and verify the information provided while creating the project in a database.json file:
$ cd mongoose-project
$ cat config/environments/development/database.json
How do you start the Strapi instance?
We are now ready to start the Strapi with MongoDB as it’s backend:
$ npm run develop

> mongoose-project@0.1.0 develop /home/omkar/strapi/mongoose-project
> strapi develop

Building your admin UI with development configuration ...

✔ Webpack
  Compiled successfully in 18.02s

[2020-03-29T09:52:07.174Z] info File created: /home/omkar/strapi/mongoose-project/extensions/users-permissions/config/jwt.json

 Project information

┌────────────────────┬──────────────────────────────────────────────────┐
│ Time               │ Sun Mar 29 2020 15:22:07 GMT+0530 (India Standa… │
│ Launched in        │ 2288 ms                                          │
│ Environment        │ development                                      │
│ Process PID        │ 1457109                                          │
│ Version            │ 3.0.0-beta.19.3 (node v12.15.0)                  │
└────────────────────┴──────────────────────────────────────────────────┘

 Actions available

One more thing...
Create your first administrator 💻 by going to the administration panel at:

┌─────────────────────────────┐
│ http://localhost:1337/admin │
└─────────────────────────────┘

[2020-03-29T09:52:07.211Z] debug HEAD /admin (18 ms) 200
[2020-03-29T09:52:07.215Z] info ⏳ Opening the admin panel...
When you open the admin panel (http://localhost:1337/admin) for the first time, you need to create a new user via the registration page: 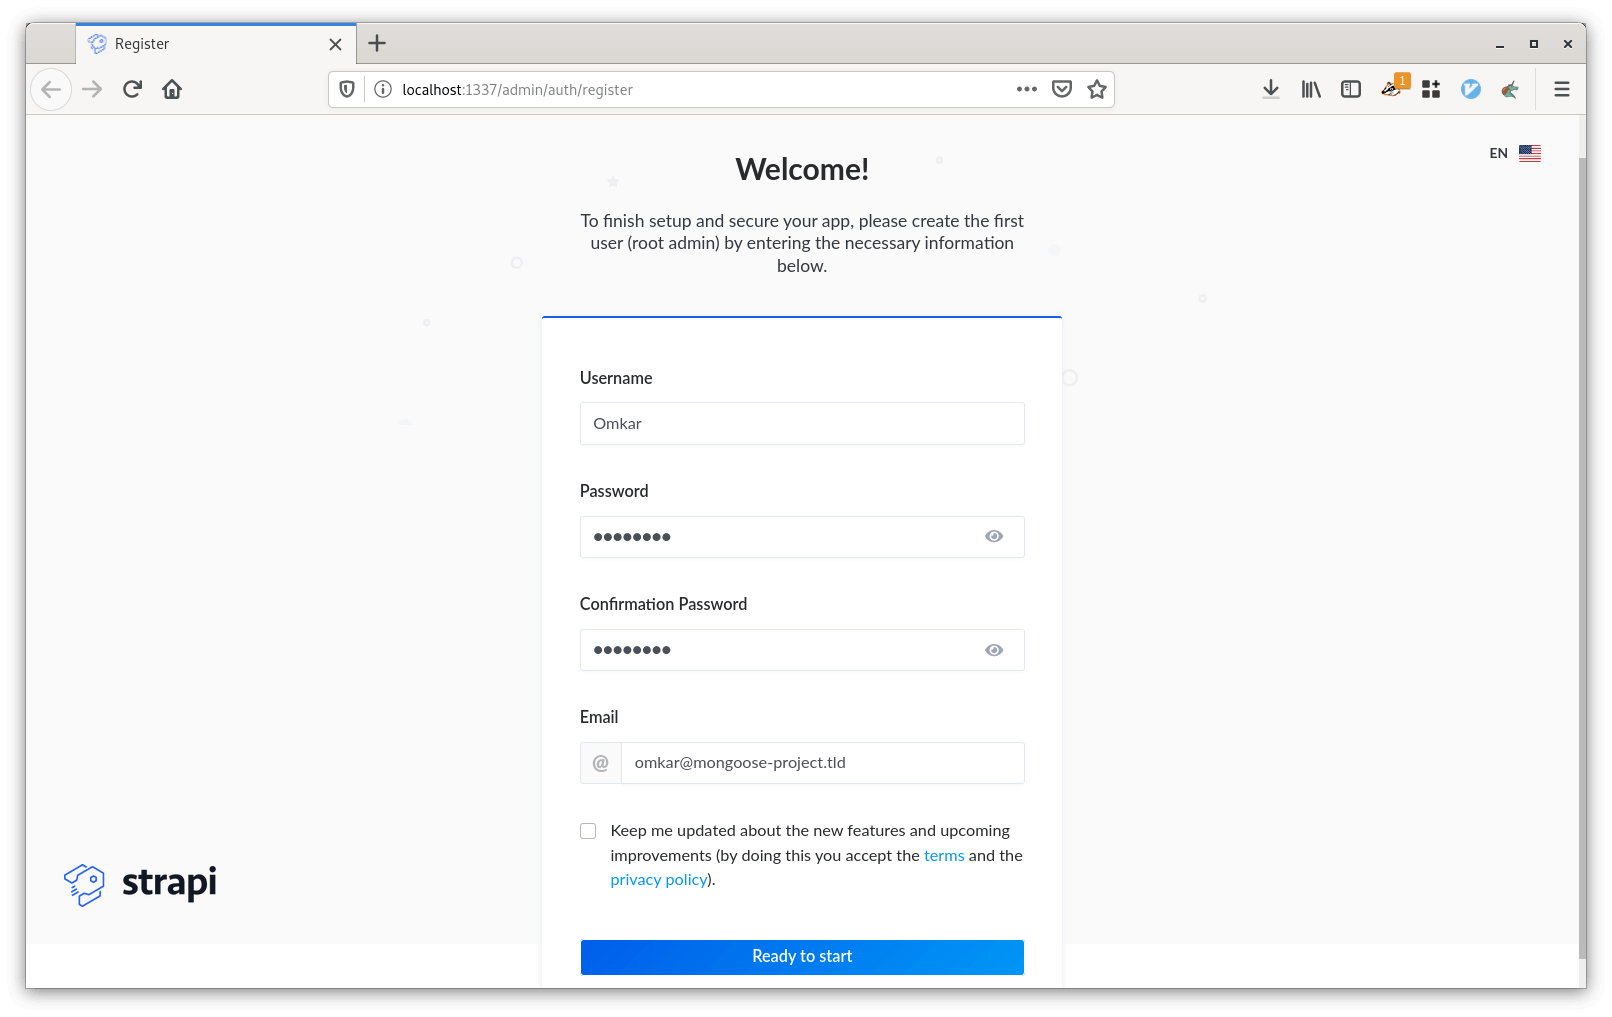 After creating the new user, Strapi will automatically log you in.
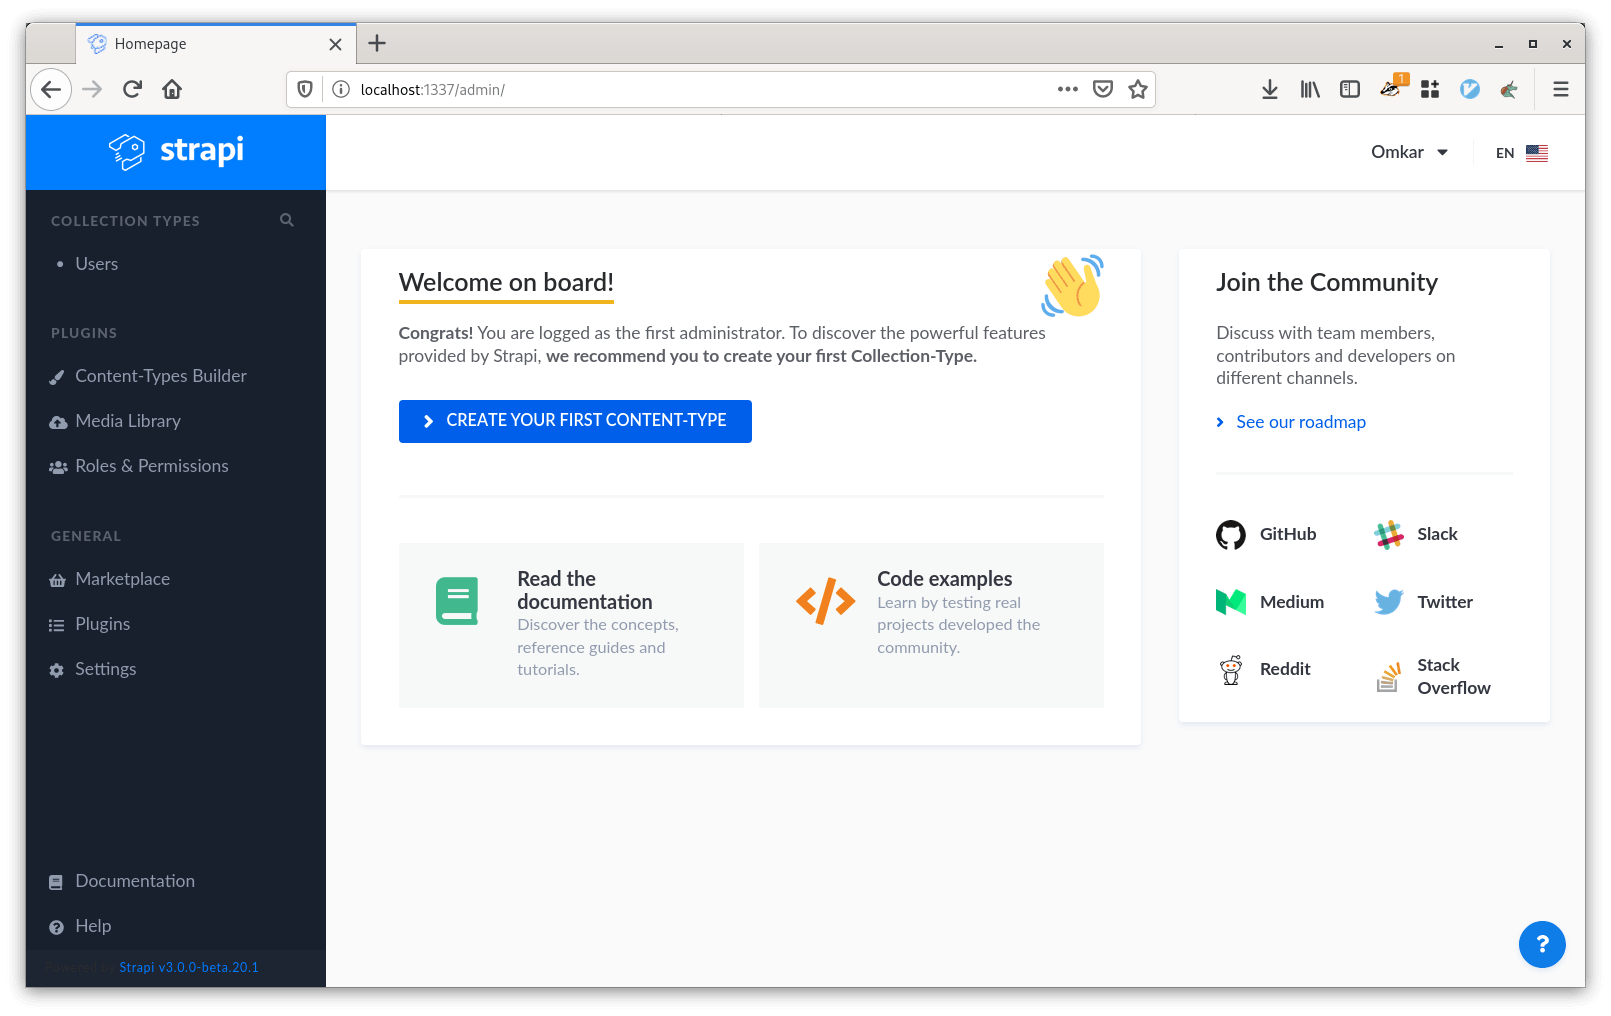
Users – The Users Permissions Plugin
Before we move on to create our first entity, let’s take a look at the Users tab that we see on the left-hand panel. This tab comes from a plugin called users-permissions. In a nutshell, this plugin provides, in the increasing level of abstraction, permissions, roles, and users for us to work with. Permissions can be fine-grained and we can restrict the permission precisely to a specific action for a specific entity. A set of these permissions can be associated with a role that can then be applied to multiple users.
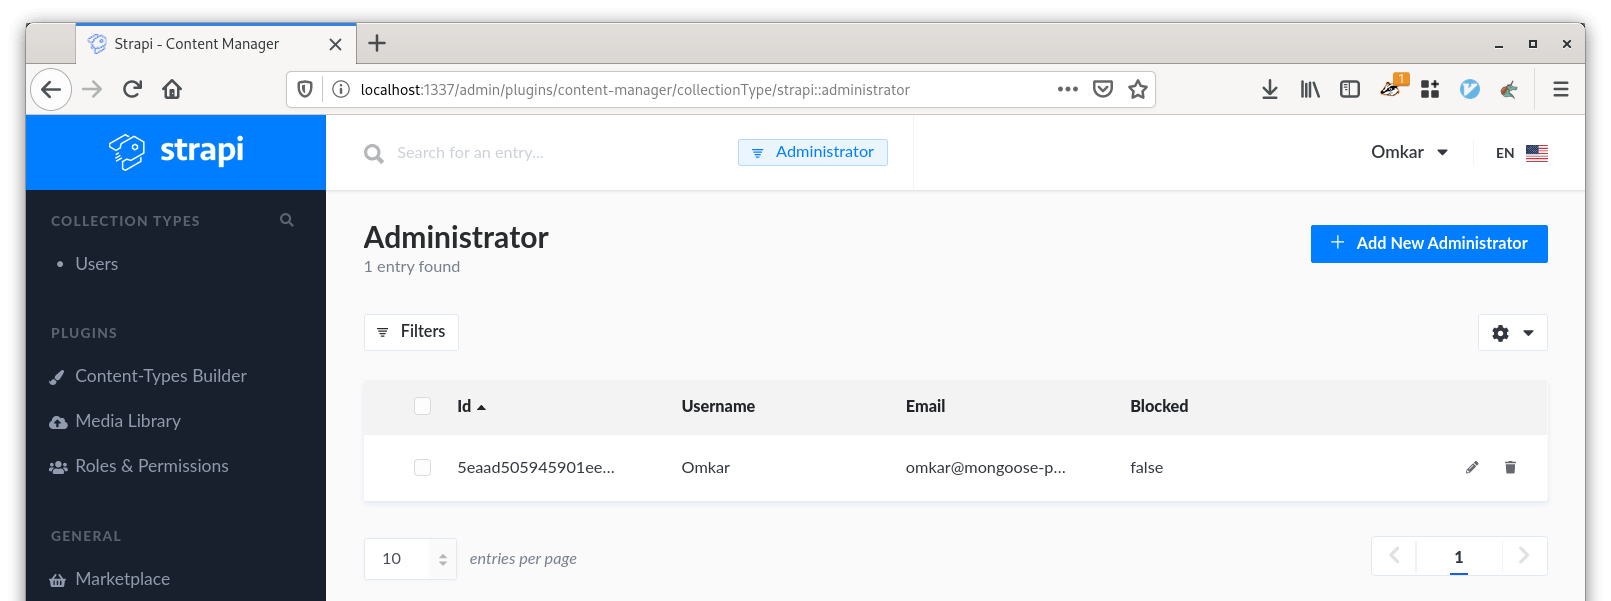
If you click on the “Users” tab, you’ll see the no users there. Strapi registers the first user as an administrator (the one we registered at the beginning). Administrators can be managed by going to ‘Manage the administrators’ section, which can be found under your name at top right. The “Roles & Permissions” tab on the left provides the interface necessary to create roles, permissions, etc.
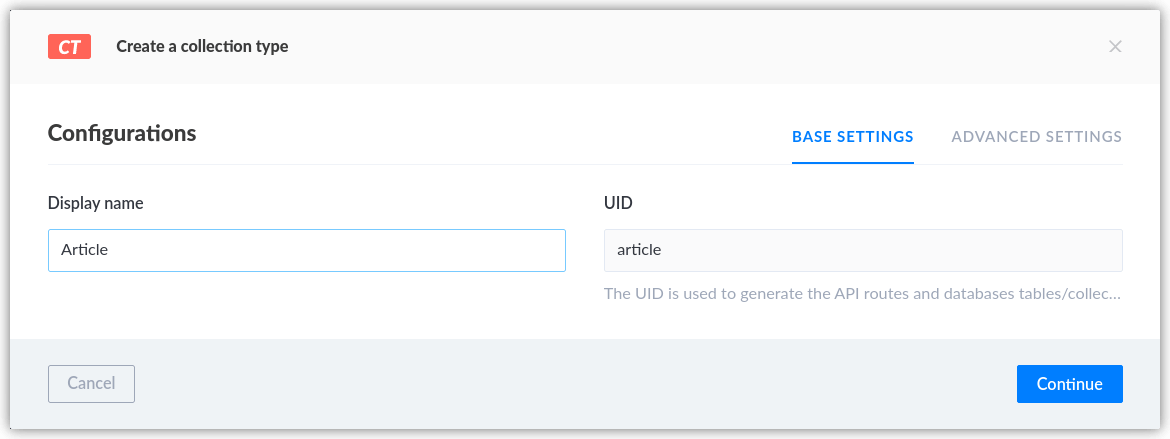
Creating The First Content-Type
To create a content-type or an entity, click on the ‘Content-Type Builder’ from left pane then click on ‘Create new collection type’. In this blog, I am creating 2 collection types, Article, and Author. After creating collection types, add appropriate fields in those.
- The article collection type can have fields like the title (Text), contents (Text), publishDate (Datetime) etc.
- The author collection type can have fields like a name (Text), designation (Text), etc.
 Along with this, we also need to create many to many relationships between author and article since one article could be written by more than one author and one author can write multiple articles. We can achieve this by adding a field in either author or article of type relation and then by selecting the type of relation as many to many.
 We can perform CRUD operations on the created content types from the UI. However, since we’ve already created these content types, we can use REST APIs to perform these operations. The documentation (swagger) plugin enables easy consumption of the APIs created for the entity types.
Swagger – The Documentation Plugin
Let’s install the documentation plugin. To do so, we need to go to the ‘Marketplace’ section from the left-hand side pane. Find the Documentation plugin and click on Download. 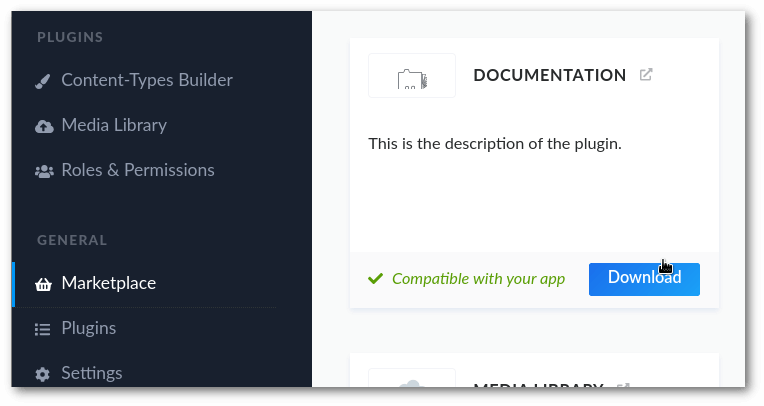
On the left-hand side panel, under plugins, we should now be able to see the documentation option. When we click on that, we see a few options like the jwt token, the link to open the documentation, the button to update the documentation, etc. Clicking on open the documentation (http://localhost:1337/documentation/v1.0.0) will take us to the documentation page. Here we can get the details of the content types that we have created and a simple mechanism to test and consume those content types.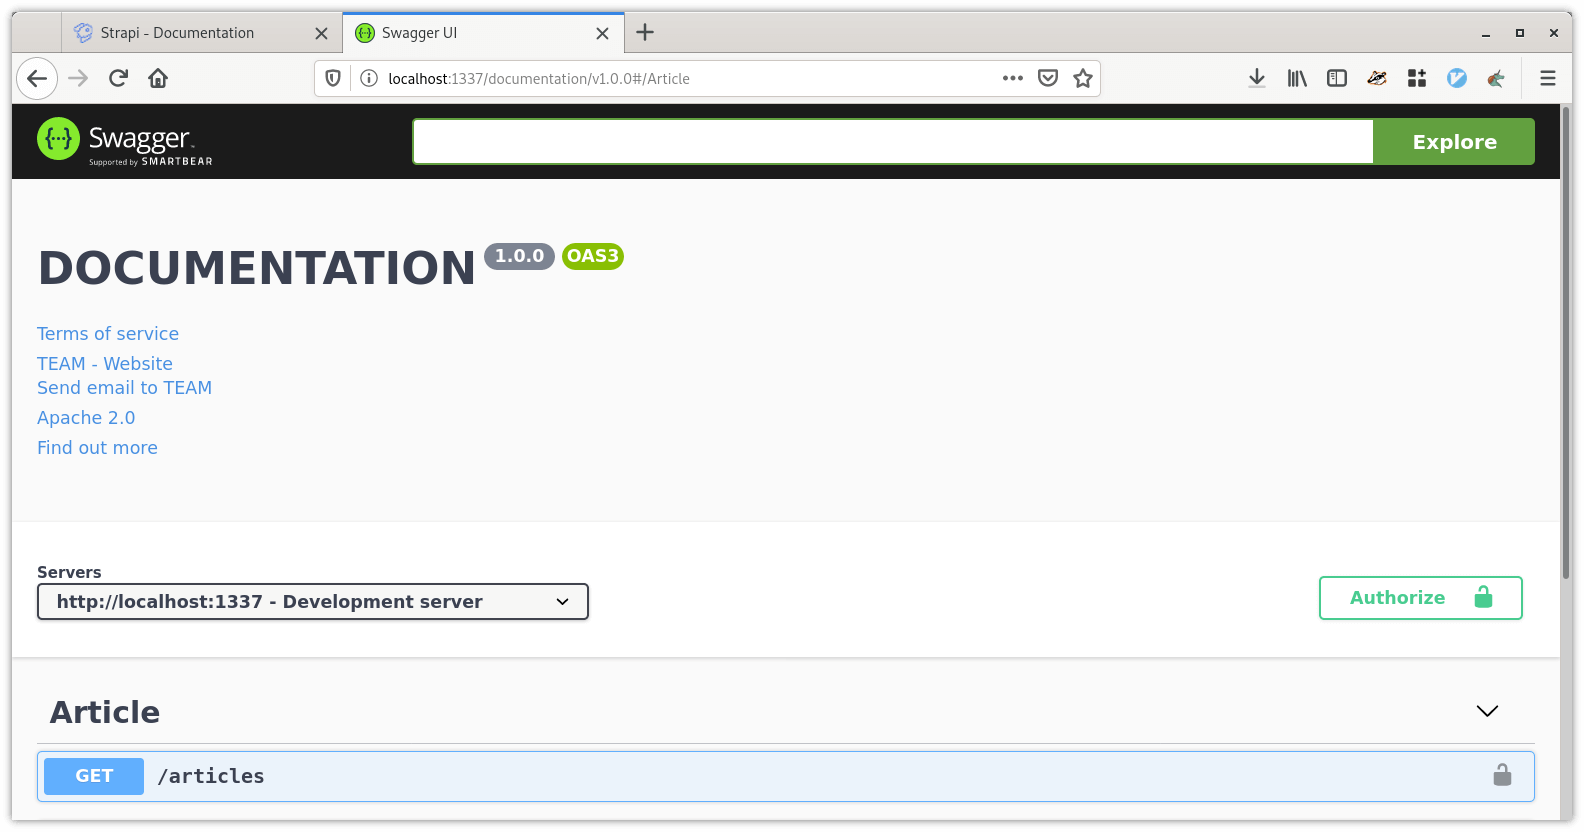
Before we can try out the APIs, we need to authorize the swagger client. We can do so by clicking on the authorize button on the right-hand side of the documentation page and adding the jwt token from the documentation plugin. After doing so, we can start using the swagger client from the documentation page.
Now that we have a Strapi server running, we can create content types (entities or models) in virtually no time. This allows us great flexibility to work on the user interface side without worrying much about the backend. These endpoints can be consumed by any frontend applications via HTTP REST.
Diving Deeper into Strapi
We’ve seen that Strapi generates some code that allows us to perform CRUD operations. But where does that code reside? In the project directory, we can see that there is a directory called api. In this directory, Strapi will create a new directory for each of the content type (model) that we create. For example, in our case, there are 2 directories, article, and author:
$ cd api/
index_image: /assets/img/blog/
$ ls
article  author
In each of those directories, we can find the code specific to those entities.
$ ls article/
config  controllers  documentation  models  services
In the config directory which will find the routes.json file, which is useful for finding out the code for a specific end-point. Example routes.json file for the article entity is shown below.
{
  "routes": [
    {
      "method": "GET",
      "path": "/articles",
      "handler": "Article.find",
      "config": {
        "policies": []
      }
    },
    {
      "method": "GET",
      "path": "/articles/count",
      "handler": "Article.count",
      "config": {
        "policies": []
      }
    },
    {
      "method": "GET",
      "path": "/articles/:_id",
      "handler": "Article.findOne",
      "config": {
        "policies": []
      }
    },
    ...
    ]
}
The above file has been shortened for brevity. The documentation directory contains the generated files used by the documentation plugin to show the Swagger UI.
In models, controllers, and services directories, we will find a structure similar to that of config. We will have a directory per entity within which the generated code will reside. The entity directories under models will also have a settings.json file within them. This file will be named as <Modelname>.settings.json. It contains the details about that entity and the attributes that belong to that entity, including the related attributes. One needs to be careful in making changes to the related attributes. Since Strapi will not work if the relationship attributes in both related entities do not match in type. The article.settings.json has been added as an example. Beyond what the UI can provide – these files can be directly edited if needed for specific use cases.
{
  "kind": "collectionType",
  "connection": "default",
  "collectionName": "Article",
  "info": {
    "name": "Article"
  },
  "options": {
    "increments": true,
    "timestamps": true
  },
  "attributes": {
    "title": {
      "type": "string"
    },
    "contents": {
      "type": "text"
    },
    "publishDate": {
      "type": "date"
    },
    "authors": {
      "collection": "author",
      "via": "articles",
      "dominant": true
    }
  }
}
File Upload – Working with files
One of the crucial things for any CMS system is the file upload functionality. Strapi comes with a built-in file upload plugin. On the left-hand panel, there’s an option for file upload called ‘Media Library’. It provides an interface for uploading the file. These files are placed in the directory <project_dir>/public/uploads.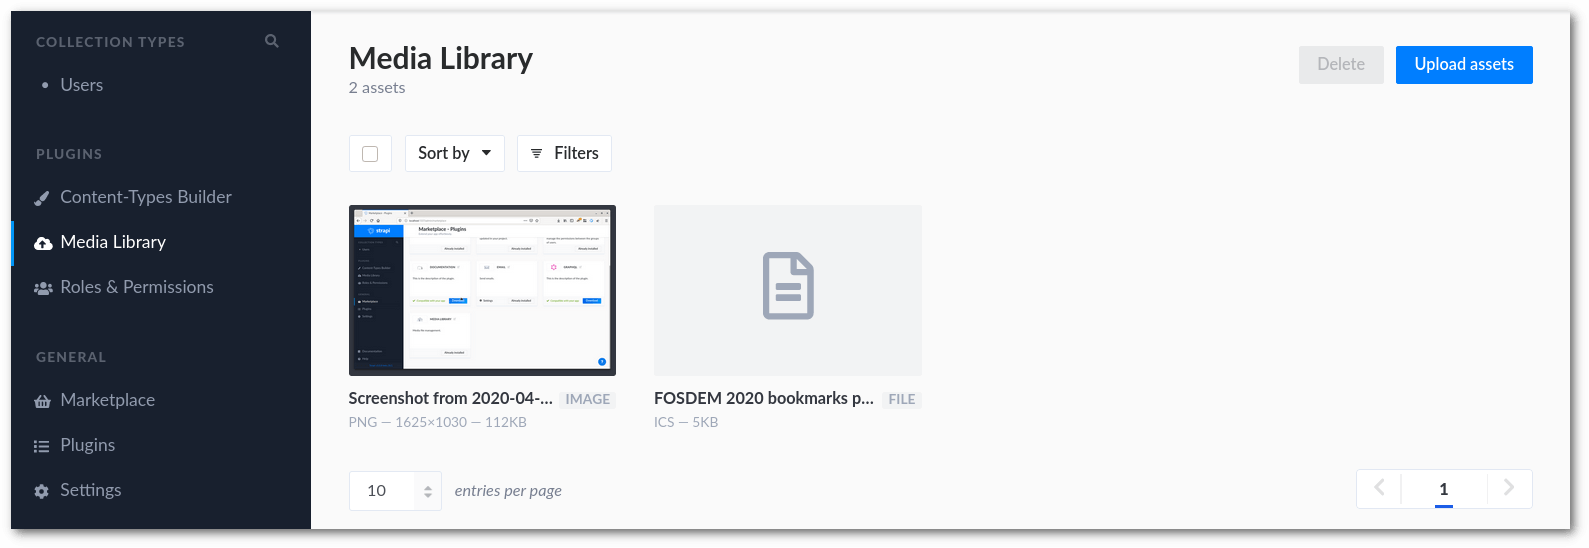
Next Steps
Strapi allows us to quickly build models without worrying about the backend side of things. While this itself is a great value addition, one of the best things about Strapi is its support of GraphQL. Strapi provides a GraphQL Plugin and Playground allows us to use GraphQL queries with the models that we’ve created. In the next article, we will cover GraphQL queries in the context of Strapi.
Hope this blog post was helpful to you. Do try this process and would love to hear your experiences, let’s connect via Twitter. Happy Coding :)
Looking for help with your cloud native journey? do check our cloud native consulting capabilities and expertise to know how we can help with your transformation journey.
Stay updated with latest in AI and Cloud Native tech
We hate 😖 spam as much as you do! You're in a safe company.
Only delivering solid AI & cloud native content.
Posts You Might Like