Guide to Istio’s Authentication and Authorization Policies

Organizations are embracing the distributed way of building applications powered by microservices and hosting them on Kubernetes. This development approach unlocks flexibility and scalability for the applications. While this is required to keep up with the customer’s expectations, it also raises concerns over security. With multiple services communicating with different services, robust security measures have become vital to protect sensitive information/data.
This is where tools like service mesh come in. Not only do they help manage microservices and abstract the task of managing them from the developers, but many of them also come with robust security mechanisms. From authentication and authorization of incoming requests to routing them, service mesh helps secure your application.
In this blog post, we’ll look at Istio and how we can leverage it to implement authentication and authorization policies to secure our application.
Overview of security options in Kubernetes
Being one of the most preferred choices for container orchestration tools, Kubernetes provides a suite of security options out of the box. From the widely used Role Based Access Control (RBAC) to Pod Security Admission and Network Policies, Kubernetes does provide a basic level of security.
Network policies allow organizations to define and enforce network-level rules within a cluster using ingress and egress rules. These allow for fine-grained control over the traffic flow between pods, namespaces, and other endpoints. These work at the IP address or port level - OSI Layer 3 or 4 to control the flow of traffic. By default, a pod allows all inbound and outbound connections and these can be controlled by using to and from selectors. Read more about network policies.
Limitations of Kubernetes network policies
While network policies do provide a basic form of security, they lack some vital features that are required for production-grade deployments.
- Network Policies in Kubernetes focus on controlling traffic between pods based on IP addresses, ports, and protocols. However, they do not provide a mechanism to force internal cluster traffic to go through a common gateway.
- Handling TLS-related tasks, such as SSL termination, certificate management, and encryption, is not a native feature of Network Policies. These do not directly handle TLS-related configurations.
As recommended by Kubernetes, a service mesh emerges as a powerful solution to overcome the above limitations of network policies. It offers advanced traffic routing capabilities along with a comprehensive TLS approach. You can read our blog post on demystifying service mesh to learn more about service meshes.
Let’s see how service meshes differ from Kubernetes network policies.
Advantages of service mesh over Kubernetes network policies
While network policies primarily handle network-level segmentation, a service mesh goes beyond that, offering a more comprehensive solution for managing and securing microservice within a cluster.
Let us examine the differences between a service mesh and Kubernetes network policies.
| Feature | Kubernetes Network Policies | Service Mesh |
|---|---|---|
| Traffic Management | Basic segmentation based on IP, ports, and protocols | Advanced features like routing, load balancing, service discovery |
| Observability | Limited or no built-in observability | Advanced observability and metrics |
| Security | No direct support for TLS | Comprehensive TLS support and encryption |
| Granularity | Pod-level network control | Fine-grained control over service-to-service traffic |
| Complexity | Simpler configuration and management | Additional complexity due to additional components (sidecar proxies) |
| Ecosystem Integration | Specific to Kubernetes ecosystem | Works with any container orchestrator |
When it comes to managing microservices communication and securing your Kubernetes environment, a service mesh offers distinct advantages over Kubernetes Network Policies.
-
Native support for mTLS and JWT authentication: Most of the service meshes provide out-of-the-box support for mutual Transport Layer Security (mTLS) and JSON Web Token (JWT) authentication. This assures secure communication between microservices by encrypting data in transit along with secured authentication mechanisms.
-
Control and visibility over network traffic: A service mesh offers advanced traffic management capabilities, such as intelligent routing, load balancing, and circuit breaking. It provides fine-grained control over network traffic, allowing you to implement traffic-shaping strategies, and observability features like metrics, logs, and distributed tracing out of the box.
-
Fine-grained access control through RBAC policies: Service meshes also enable granular access control through Role-Based Access Control (RBAC) policies. You can write and enforce policies that govern which services can communicate with each other, based on specific criteria like service identity, namespace, or labels.
There are different types of service meshes available today and most of them offer these capabilities. In the following section, we’ll shift our focus to Istio and learn about its authentication and authorization options.
Istio - empowering authentication and authorization
Istio is a popular open source service mesh that seamlessly integrates with Kubernetes. It unlocks advanced capabilities ranging from traffic management to observability and security. Istio acts as an infrastructure layer between application services – enabling transparent and intelligent communication between them. Service mesh enhances the control and reliability of your Kubernetes deployments. Its core features include:
-
Traffic management: Istio enables fine-grained control over traffic routing, load balancing, and fault tolerance through intelligent routing rules. It offers capabilities like weighted routing, circuit breaking, and retries to optimize traffic flow and ensure robustness. One can also use Istio for progressive delivery and automate your application deployments.
-
Observability: Istio provides comprehensive observability through metrics, distributed tracing, and logging. You can monitor and analyze service-level performance, latency, and error rates to identify and resolve issues effectively.
-
Security: Istio strengthens the security of your Kubernetes environment by providing secure communication between services through automatic mutual TLS encryption. It also offers features like access control, authentication, and authorization through robust identity and security policies.
These were just a few features of Istio. You can refer to Istio’s documentation for the complete list of features.
Of all these, security is going to be the focus of our discussion going forward. We’ll understand the various options it provides from a security perspective.
-
mTLS for service-to-service communication: mTLS (mutual Transport Layer Security) is a security mechanism that ensures encrypted and authenticated communication between services. Istio provides native support for mTLS encryption, ensuring secure communication between services within the cluster.
-
Authorization and authentication with JWT tokens: Istio adds an additional layer of security by utilizing JSON Web Tokens (JWT) for authorization and authentication. Services can verify the authenticity of JWT tokens to grant access based on the claims contained within the token. This helps prevent unauthorized requests and enhances overall security.
-
Allow/Deny & custom policies: Istio allows the creation of Allow/Deny policies to define which services are allowed or denied communication based on various criteria such as source, destination, and other attributes. Additionally, Istio enables the creation of custom policies to meet specific security requirements, providing granular control over service-to-service communication.
Implementing authentication and authorization policies in Istio
In the preceding sections, we learned about various security features that Istio provides. We’ll now see how to implement these in a microservices-based application deployed on a Kubernetes cluster.
Pre-requisites
- Kubernetes cluster - we’re using Minikube for this blog post
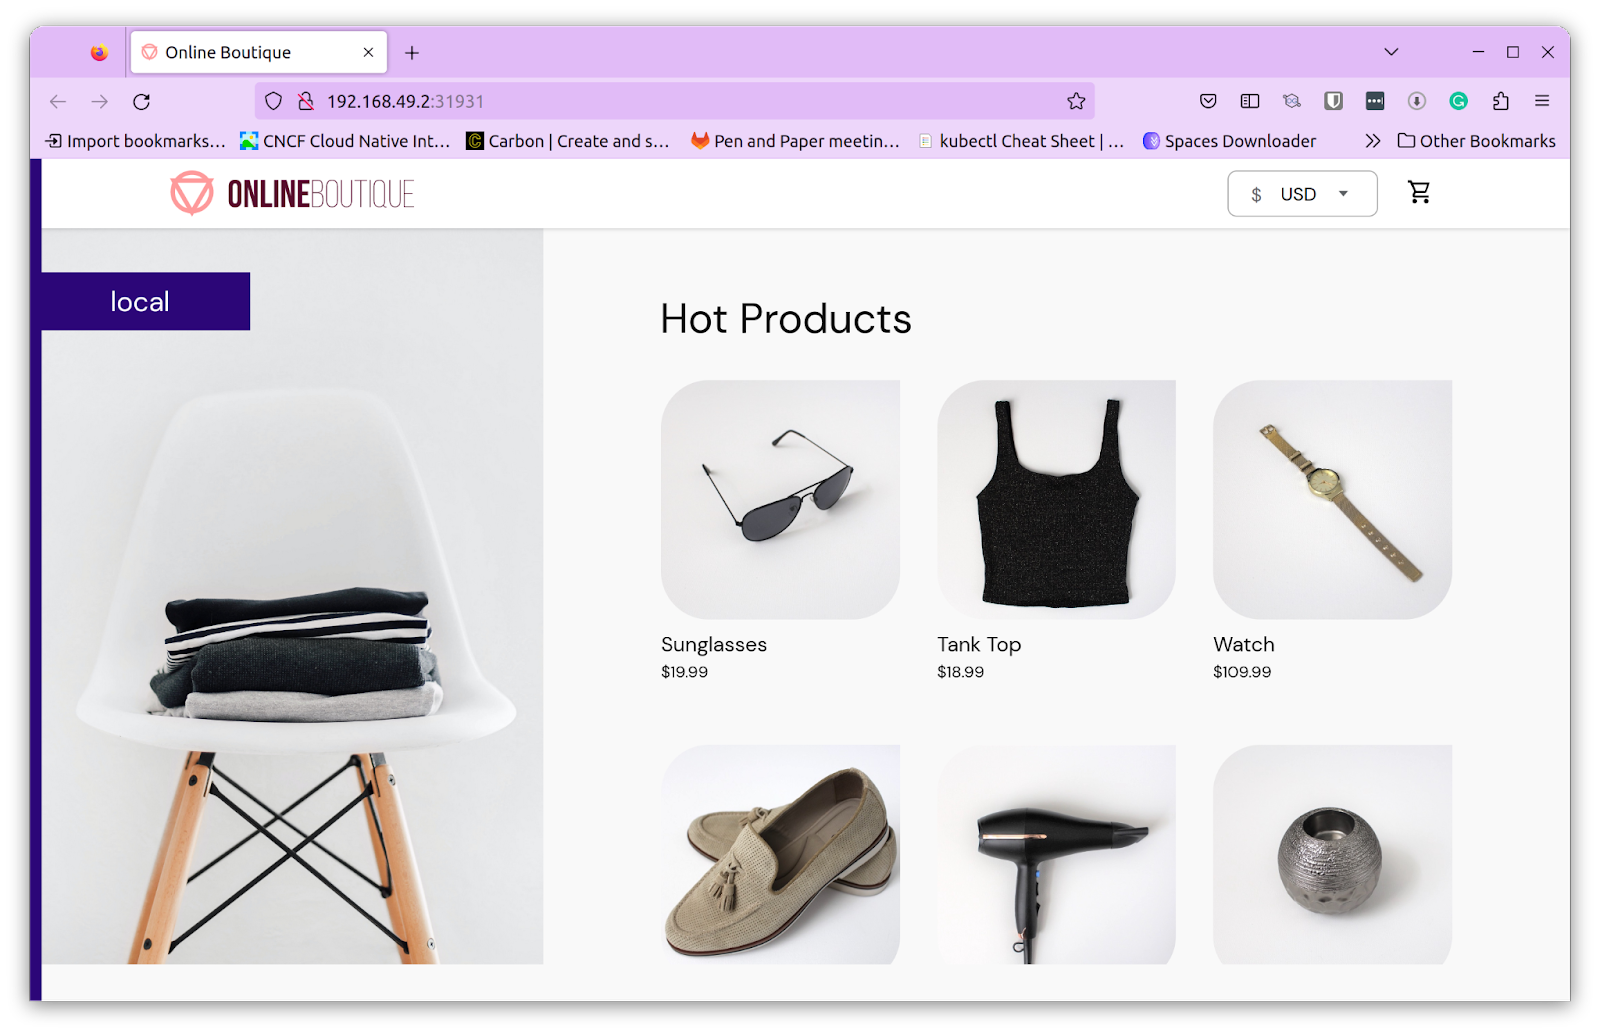
- Microservices-based application - we’re using the Online Boutique application
Setting up Istio
Setting up Istio on our Kubernetes cluster is fairly simple and the official documentation is perfect for it. At a very high level, there are three things that need to be done:
- Download the latest version of Istio & configure
istioctl - Install Istio using the demo profile
- Enable automatic sidecar injection for the default namespace using
kubectl label namespace default istio-injection=enabled
With this, we have configured Istio on our cluster and enabled automatic sidecar injection in the default namespace. Any application we now install to the default namespace will have the sidecar injected automatically.
Deploy online boutique application
The next step is to deploy the Online Boutique application.
Clone the repo
https://github.com/GoogleCloudPlatform/microservices-demo
Deploy the application
kubectl apply -f ./release/kubernetes-manifests.yaml
Verify deployment
kubectl get pods -A

NAMESPACE    NAME                                 	READY   STATUS	AGE
default   	 adservice-5f58d84d94-pjgsk           	2/2 	Running   2m34s
default   	 cartservice-58c4f996f5-jssdl         	2/2 	Running   2m34s
default   	 checkoutservice-65886cf7fb-mnxhv     	2/2 	Running   2m34s
default   	 currencyservice-645c6dd8-rz9pq       	2/2 	Running   2m34s
default   	 emailservice-7956996f78-2rtqt        	2/2 	Running   2m34s
default   	 frontend-78f8447ffd-fvx7j            	2/2 	Running   2m34s
default   	 loadgenerator-5cdd7f7bfc-dcgmg       	2/2 	Running   2m34s
default   	 paymentservice-767f89d888-pz7jc      	2/2 	Running   2m34s
default   	 productcatalogservice-5dbbcc58b6-fv8xh   2/2 	Running   2m34s
default   	 recommendationservice-f5d756558-dxnwh	2/2 	Running   2m34s
default   	 redis-cart-66fc6f5646-vrfds          	2/2 	Running   2m34s
default   	 shippingservice-9c9675994-rdr7v      	2/2 	Running   2m34s
We can see that the application is deployed successfully. If we observe closely, we see that every pod has 2 containers and that’s because of the automatic sidecar injection that we enabled.
We can also access the application using the URL of the frontend-external service. Type minikube service list and click on the URL against the frontend-external service.
Implementing mTLS
By default all the communication that happens within the cluster is not encrypted i.e.: both TLS and plain text traffic are accepted. We can check that by accessing the frontend service from a pod using a cURL request as shown below:
kubectl exec $(kubectl get pod -l app=productcatalogservice -o jsonpath={.items..metadata.name}) -c istio-proxy -- curl http://frontend:80/ -o /dev/null -s -w '%{http_code}\n'

200
We can see that the response is 200, this means that the service is accessible without any authentication mechanism in place.
We can implement mTLS per service or for the entire namespace. Use the following yaml file to enable strict mTLS for the complete namespace.
apiVersion: "security.istio.io/v1beta1"
kind: "PeerAuthentication"
metadata:
  name: "default"
  namespace: "default"
spec:
  mtls:
    mode: STRICT
Apply this configuration
Kubectl apply -f mtls-ns.yaml
Let’s execute the same that we used earlier to access the frontend service from another pod.
kubectl exec $(kubectl get pod -l app=productcatalogservice -o jsonpath={.items..metadata.name}) -c istio-proxy -- curl http://frontend:80/ -o /dev/null -s -w '%{http_code}\n'
000
command terminated with exit code 56
The HTTP Response code is not 200. Instead, the command terminates with exit code 56. This means that the request failed to receive any data and this is because there was no TLS certificate that was passed with the request. If you want to know more, read this thread on istio mTLS proof with tcpdump.
With this, we have enabled strict mTLS for the entire namespace and every request has to be mTLS.
Note: If mTLS is set to strict and your application is exposed using ingress controller, make sure to inject the Istio sidecar inside the Ingress controller as well else It won’t be able to communicate with the application.
Implementing JWT authentication
Istio also provides authentication mechanisms for secured access. We will now enable origin authentication using JWT tokens. We first need to create and apply a policy that will enforce JWT authentication.
But before doing that we need to create a public-private key pair using which we will create JWT token that will be used.
Key generation
Generate public/private keys using the following commands:
$ openssl genrsa -des3 -out private_encrypted.pem 2048
$ openssl rsa -pubout -in private_encrypted.pem -out public.pem
$ openssl rsa -in private_encrypted.pem -out private.pem -outform PEM
There are different ways to generate a token, we’ll use a simple Python script to generate a token for us. All the Python files used here are placed in this repo.
from authlib.jose import jwt

header = {'alg': 'RS256'}
payload = {'iss': 'admin@infracloud.io', 'sub': 'admin', 'exp': 1685505001}
private_key = open('private.pem', 'r').read()
bytes = jwt.encode(header, payload, private_key)
print(bytes.decode('utf-8'))
Here we provide the details like issuer, subject, and expiry time along with the private key. The code will generate a token.
We then need to generate JWK that we’ll pass as a parameter in Istio’s policy configuration yaml. We’ll use another simple Python script to do that:
from authlib.jose import jwk
public_key = open('public.pem', 'r').read()
key = jwk.dumps(public_key, kty='RSA')
print(key)
Pass the public key file that we generated earlier and this will generate the JWK key that is required to create the Istio policy.
Policy creation
We will create a yaml configuration file that will enforce JWT authentication for all incoming requests to the frontend service.
apiVersion: security.istio.io/v1beta1
kind: RequestAuthentication
metadata:
 name: frontend
 namespace: default
spec:
  selector:
    matchLabels:
      app: frontend
  jwtRules:
  - forwardOriginalToken: true
    issuer: admin@infracloud.io
    jwks: |
      {"keys": [{"n": "<actual-key>", "e": "AQAB", "kty": "RSA"}]}
Note: Replace <actual-key> with your actual key.
Apply the file to enforce the policy
kubectl apply -f jwt.yaml
Now let us make a request to the frontend by passing the authentication token. We can create a variable named TOKEN and pass it in the cURL request.
kubectl exec $(kubectl get pod -l app=productcatalogservice -o jsonpath={.items..metadata.name}) -c istio-proxy \
-- curl  http://frontend:80/ -o /dev/null --header "Authorization: Bearer $TOKEN" -s -w '%{http_code}\n'
200
Let us remove the token and retry.
kubectl exec $(kubectl get pod -l app=productcatalogservice -o jsonpath={.items..metadata.name}) -c istio-proxy -- curl  http://frontend:80/ -o /dev/null -s -w '%{http_code}\n'
403
We get an HTTP 403 - Forbidden response, which validates that our policy is working as expected.
Implementing authorization
Authentication refers to the “who” should be allowed access while Authorization refers to “what” they are allowed to access. For instance, a user request with a valid token can access the frontend service. Let us understand that through a simple example.
Create a new yaml configuration to enable authorization
apiVersion: security.istio.io/v1beta1
kind: AuthorizationPolicy
metadata:
  name: require-jwt
  namespace: default
spec:
  selector:
    matchLabels:
      app: frontend
  action: ALLOW
  rules:
  - when:
    - key: request.auth.claims[iss]
      values: ["admin@infracloud.io"]
    - key: request.headers[hello]
      values: ["world"]
In this AuthorizationPolicy, we validate the issuer of the key for every request. In this case, it’s supposed to be admin@infracloud.io. If you remember, while creating a JWT token, we provided this as the issuer. We also mention that there has to be a header named hello and its value must be world So only those requests which have a token that is issued by admin@infracloud.io and a valid header will be able to access the frontend service.
Let us apply this policy.
kubectl apply -f authz.yaml
Now let us first access the service without a token and a header and see what response we get.
kubectl exec $(kubectl get pod -l app=productcatalogservice -o jsonpath={.items..metadata.name}) -c istio-proxy -- curl  http://frontend:80/ -o /dev/null -s -w '%{http_code}\n'
403
The response is HTTP 403 - Forbidden, as expected. If we pass a valid token, we get HTTP 200 - Success. This means the policy is working just fine.
kubectl exec $(kubectl get pod -l app=productcatalogservice -o jsonpath={.items..metadata.name}) -c istio-proxy -- curl  http://frontend:80/ -o /dev/null --header "Authorization: Bearer $TOKEN" --header "hello:world" -s -w '%{http_code}\n'
200
Let us also see this using postman.
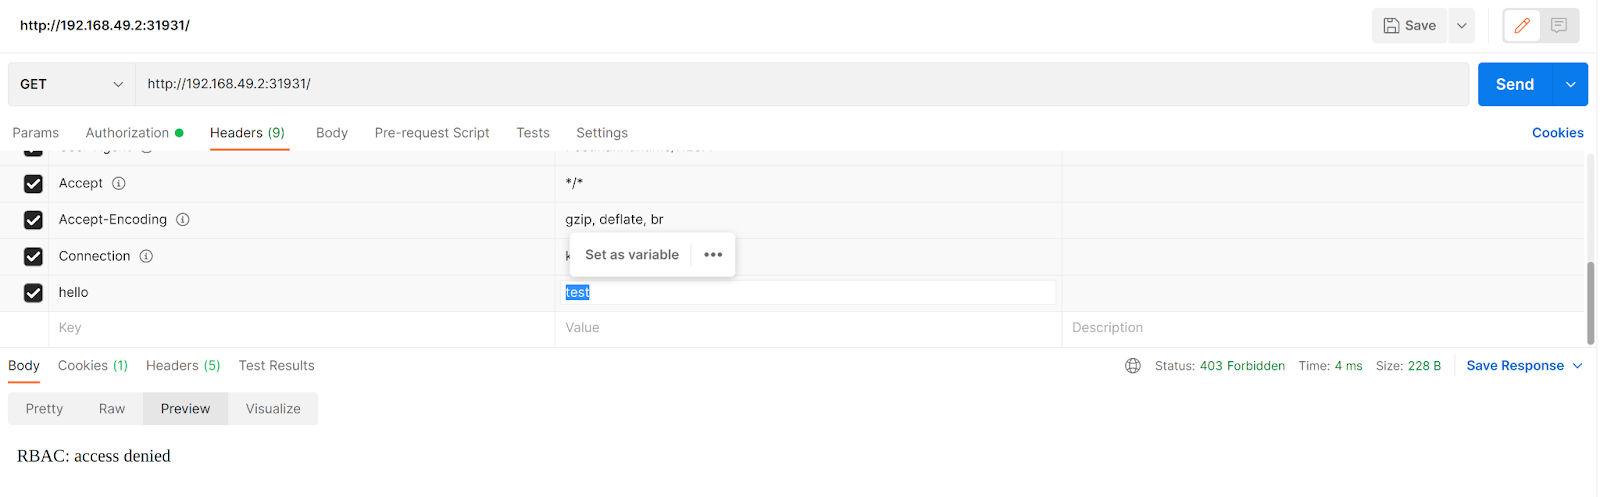
We get RBAC:access denied error when we pass the header as hello:test instead of hello:world
If the user tries to access any other service even with a valid token and a header, it will be denied as the authorization policy that we’ve created allows access only to the frontend service and nothing else.
Hence, using mTLS, JWT Authentication, and Authorization policies, Istio provides finer controls over who accesses your services and what they can do. This fine-grained control is missing in the native options provided in Kubernetes and hence a service mesh like Istio is preferred. You can configure these policies based on your requirements to secure your application.
Summary
Safeguarding the safety and integrity of our applications, authentication, and authorization are of utmost importance. While Kubernetes does offer some solutions out-of-the-box, they fail to provide finer access control options. That’s where service meshes shine and a tool like Istio takes center stage.
Istio simplifies the implementation of authentication and authorization and provides a seamless solution for controlling access. With Istio, we get fine-grained control over who accesses what which helps us fortify our applications.
While the blog post showed how easy it is to leverage Istio, in real-world applications, things are much more complicated. There might be hundreds of services, spread across different clusters accessed by thousands of users. That’s where our Istio experts can help you. With our rich experience in configuring Istio for large production deployments, we understand it like nobody else and our Istio support team is more than capable of resolving emergency conflicts.
If you found this blog post helpful, please share it with your peers. If you feel this can be improved, connect with me on LinkedIn to take it forward.
Stay updated with latest in AI and Cloud Native tech
We hate 😖 spam as much as you do! You're in a safe company.
Only delivering solid AI & cloud native content.
Posts You Might Like