Simplifying Kubernetes Native Testing with TestKube

Testing methodology refers to the process and procedures used to evaluate the quality, correctness, and completeness of software applications. The importance of testing methodology lies in its ability to identify defects and issues early in the development process, thus reducing the time and effort to fix them later. By identifying the defects early, testing can help to improve the functionality and reliability of software applications.
There are numerous software testing tools available in the market that serve different purposes and testing requirements. Popular testing tools including Selenium, JMeter, Appium, SoapUI, Postman, and Cucumber might not be a suitable option to test a cloud native application.
Testing cloud native applications is different from normal testing as:
-
Cloud native applications are typically built using a distributed and microservices-based architecture. This means testing the interactions and integration between various microservices and ensuring seamless collaboration. In contrast, traditional applications often have a monolithic architecture, so you have to focus on testing individual components.
-
Cloud native applications abstract the underlying infrastructure using services like Infrastructure as a Service (IaaS) or Platform as a Service (PaaS). Testing cloud native applications requires verifying compatibility and functionality across different cloud providers and configurations. Traditional applications are usually developed and tested within a specific infrastructure environment.
Due to the complex nature of cloud native applications, a cloud native testing framework is a better choice as it enables developers and testers to build and test applications designed to run on cloud platforms. Cloud native testing tools are developed specifically for cloud native environments. Most importantly, they allow you to deploy tests in your clusters and make the executions super scalable. Plus, they are not coupled to any CI/CD framework such as Jenkins, GitHub Actions, etc.
One such cloud native testing framework is Testkube - which will be the focus of this blog post. We will cover what Testkube is, its capabilities, and how you can run tests in your Kubernetes cluster using it.
What is Testkube?
Testkube is an open source, cloud native testing framework that simplifies the testing of Kubernetes applications. It allows users to store, execute and manage tests as part of a Kubernetes cluster. With Testkube, users can utilize multiple testing frameworks, orchestrate tests and perform automated testing. Additionally, it has a user-friendly web-based UI and CLI (command line interface) for better visibility and management.
Now we have an understanding of Testkube and how it simplifies the testing of Kubernetes applications, let’s dive into its capabilities and use cases.
Capabilities of Testkube
-
Run your tests inside your cluster: Testkube enables users to run their tests directly inside their Kubernetes cluster instead of executing them from a CI pipeline. This provides a significant networking security advantage, as it eliminates the need to expose the cluster to the outside world in order to test its applications. By keeping the testing environment within the cluster, Testkube helps to ensure the integrity and security of the testing process.
-
Support for multiple testing frameworks: With a flexible test execution framework that comes with pre-built executors for popular testing tools like Postman, Cypress, and K6, Testkube enables users to leverage existing testing assets. It also provides the option to create custom executors for any type of tests users want to run within their cluster.
-
Test orchestration: Testkube empowers users to orchestrate multiple tests, making it easier to manage complex testing scenarios.
-
Integration with CI/CD: You can integrate Testkube with CI/CD tool of your choice including Jenkins, TravisCI, CircleCI and make it easier to automate testing.
-
Centralized dashboard and storage of test artifacts: Testkube provides web-based UI, CLI, and a centralized dashboard for testing which helps in better visibility and management of tests. It enables you to retrieve the results of the tests generated by the testing tools from its storing facilities.
When it comes to use cases, Testkube can be used by developers, DevOps teams, and QA teams for testing Kubernetes applications at various stages of the development process, from local development to production. For instance, developers can use Testkube to test their application logic, while expert DevOps teams can use it to automate tests in their CI/CD pipeline. QA teams can use Testkube to ensure that Kubernetes applications are functioning correctly in different scenarios.
Now we know what Testkube can do, we will see it in action. We will set it up to create and run a few tests, learn about test triggers, and use GitHub Actions that will allow us to enable automated testing with each PR.
Let’s proceed with the installation of Testkube.
Testkube installation
First, we will install Testkube CLI.
Step 1: Installation of Testkube CLI
We will use the script installation method:
curl -sSLf https://get.testkube.io | sh
After running the above command, Testkube CLI will be installed. Next, we will install the cluster component using this CLI.
Step 2: Install Testkube cluster components using Testkube’s CLI
We can also use Helm chart to deploy the Testkube cluster component. However, here we will be using Testkube CLI.
testkube init
Just run the above command, and the components will be installed. Make sure that the kubeconfig file points to the desired cluster where the Testkube needs to be installed.
The following components will be installed, once we run the above command:
- Testkube API
- Testkube namespace
- CRDs for Tests, TestSuites, Executors
- MongoDB - It is used to store test results and other Testkube configurations.
- Minio - default (can be disabled with
--no-minio) - Minio is used as a storage server to store the test artifacts - NATS - It is used as a event bus to store all the test related events
- Dashboard - default (can be disabled with
--no-dashboardflag)
To know more about the setup configurations, refer to the official Testkube installation documentaion.
Now, let’s check if all the components are deployed by running the following command.
➜ kubectl get pods -n testkube
NAME                                                    READY   STATUS    RESTARTS   AGE
testkube-api-server-76cb76dd9c-9tvmr                    1/1     Running   0          3m59s
testkube-dashboard-56c78fdc79-nw7cj                     1/1     Running   0          3m59s
testkube-minio-testkube-bd549c85d-rrwlq                 1/1     Running   0          3m59s
testkube-mongodb-d78699775-48jkm                        1/1     Running   0          3m59s
testkube-nats-0                                         3/3     Running   0          3m59s
testkube-nats-box-5b555bc9c4-w9zfj                      1/1     Running   0          3m59s
testkube-operator-controller-manager-7cb8cdcbb9-smcqr   2/2     Running   0          3m59s
As we can see, all components are running fine. Next, we will be creating and running tests using Testkube.
Create and run tests
I have created a basic Django application which prints “The install worked successfully” available at this repo. For setting up this application, I am using minikube enabled with ingress. So first we will deploy this application in our cluster and then will create tests for the same.
-
Clone the repository and create a pod and service by running the below commands.
 git clone https://github.com/infracloudio/testkube-django-app.git
 cd myproject
 kubectl apply -f deployment.yaml -f service.yaml -f ingress.yaml
Once we run the above command, a pod, service and ingress will be created.
➜ kubectl get pods | grep myproject myproject-7777f9f588-xbcnr 1/1 Running 0 60s -
After the ingress is created, we will update the /etc/hosts with the hostname and IP of the ingress as shown in the screenshot below so that we can access the application endpoint at django-test.com.
 ➜ kubectl get ingress
 NAME                 CLASS   HOSTS             ADDRESS        PORTS   AGE
 django-app-ingress   nginx   django-test.com   192.168.49.2   80      17h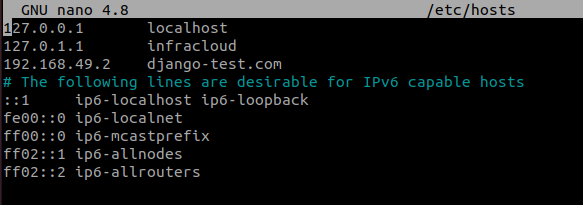
After the application pod is created, we will create integration and load tests.
Integration tests
I have written a sample integration test in Go, so we will use Ginkgo executor which supports the tests written in Go.
-
For creating the test, run the below command.
kubectl testkube create test \
  --git-uri https://github.com/infracloudio/testkube-django-app.git \
  --git-path myproject/examples/ \
  --type ginkgo/test \
  --name django-app-test \
  --git-branch master
git-uri is the url of GitHub repository where the test case exists
-
Once we run the above command, a test will be created. We can check it by running a command as shown below.
➜ kubectl get tests.tests.testkube.io -A NAMESPACE NAME AGE testkube django-app-test 31m -
Next, we will access the Testkube UI by running the below command. Once we execute this command, a web page will open on the default browser at localhost:8080
testkube dashboard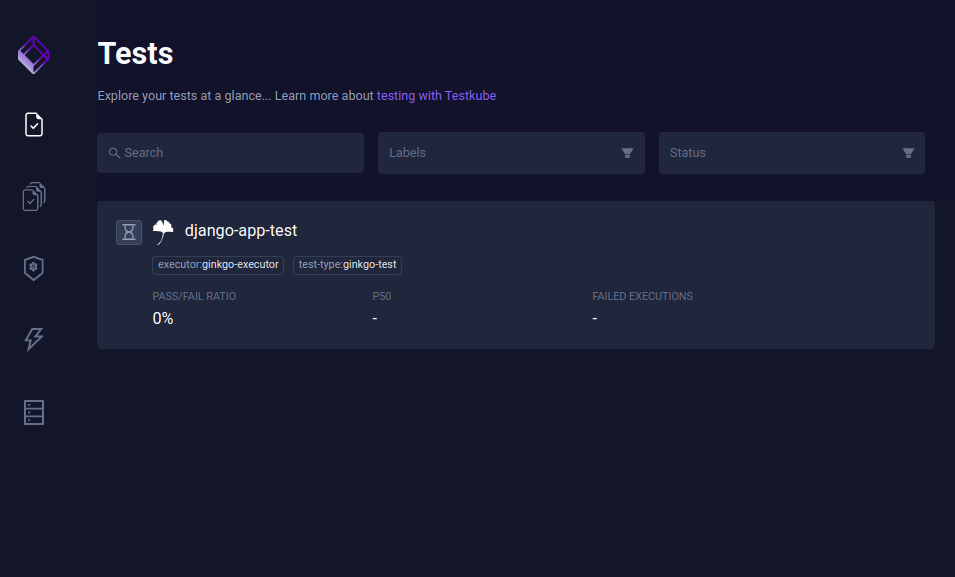
-
Now we can see that the test is created, so we will run the tests by clicking on Run now option as shown below.
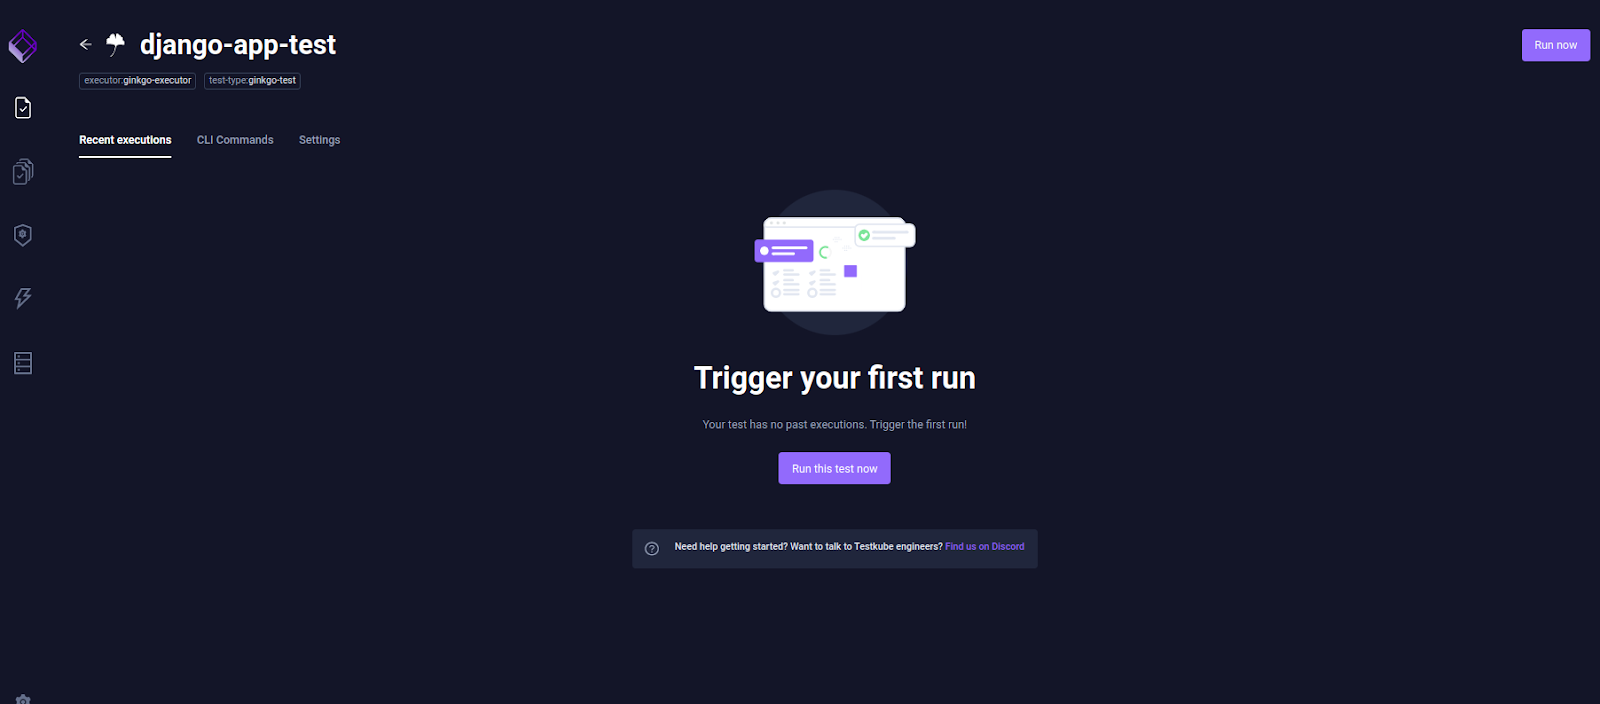
-
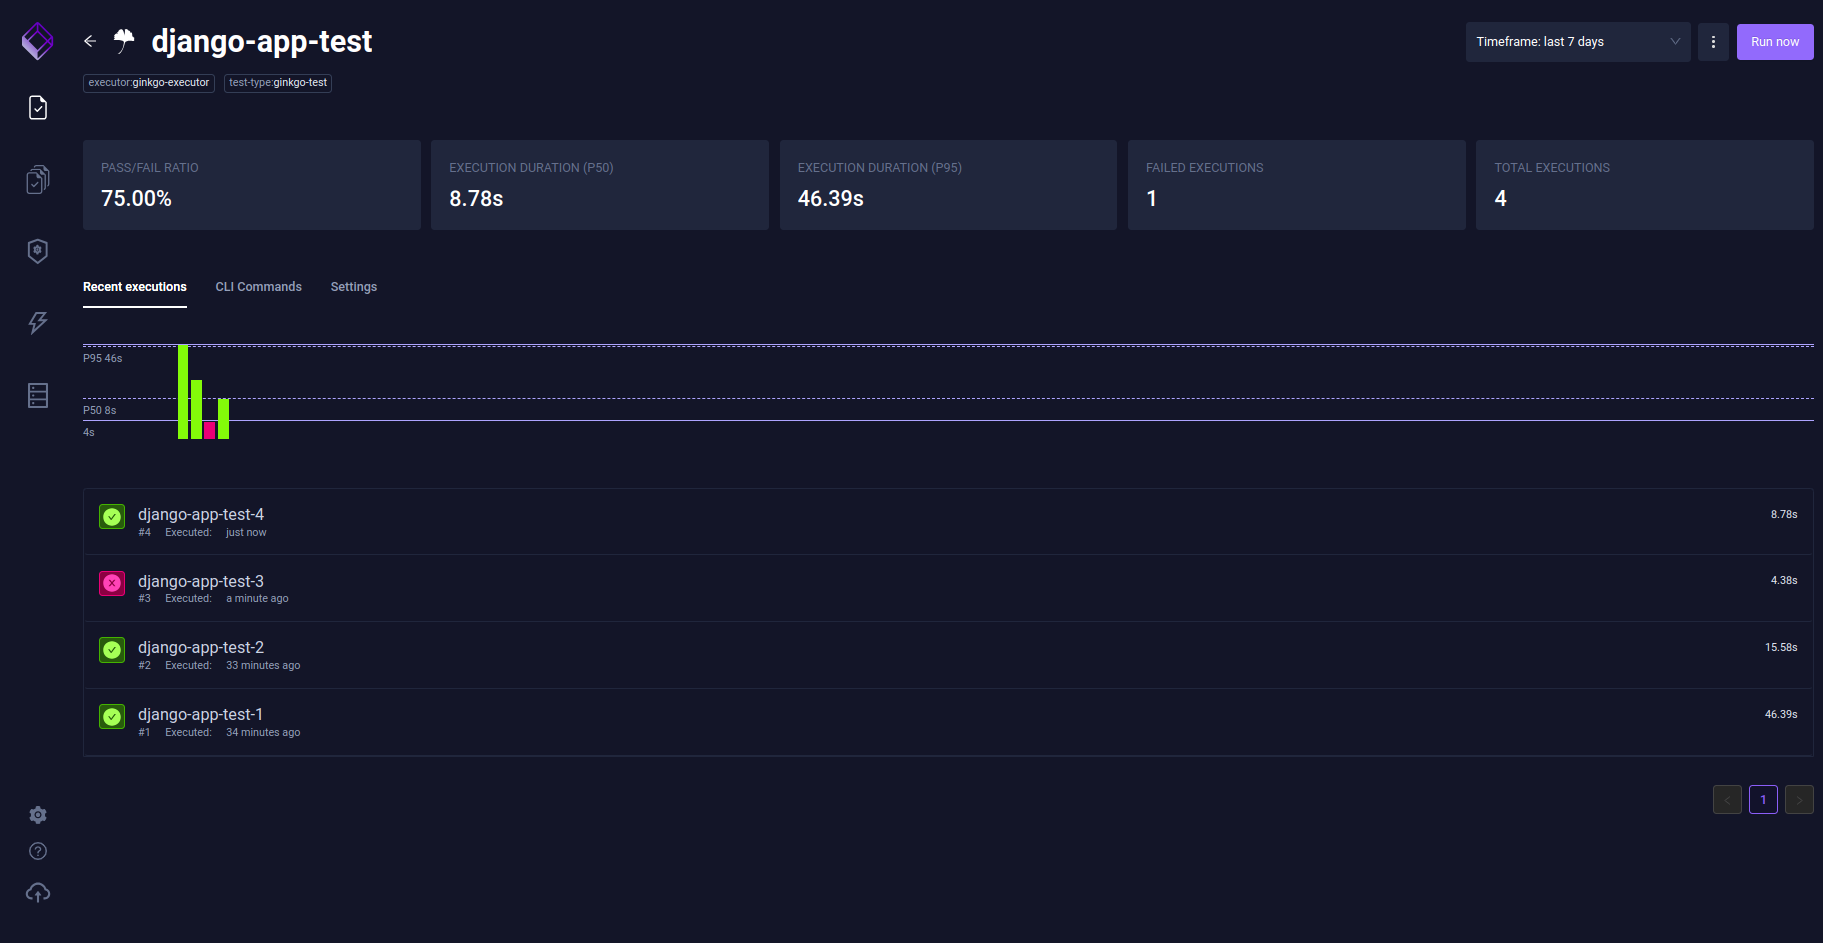
After we click on Run now, the test will be triggered and we can see the output if the test has passed or not.
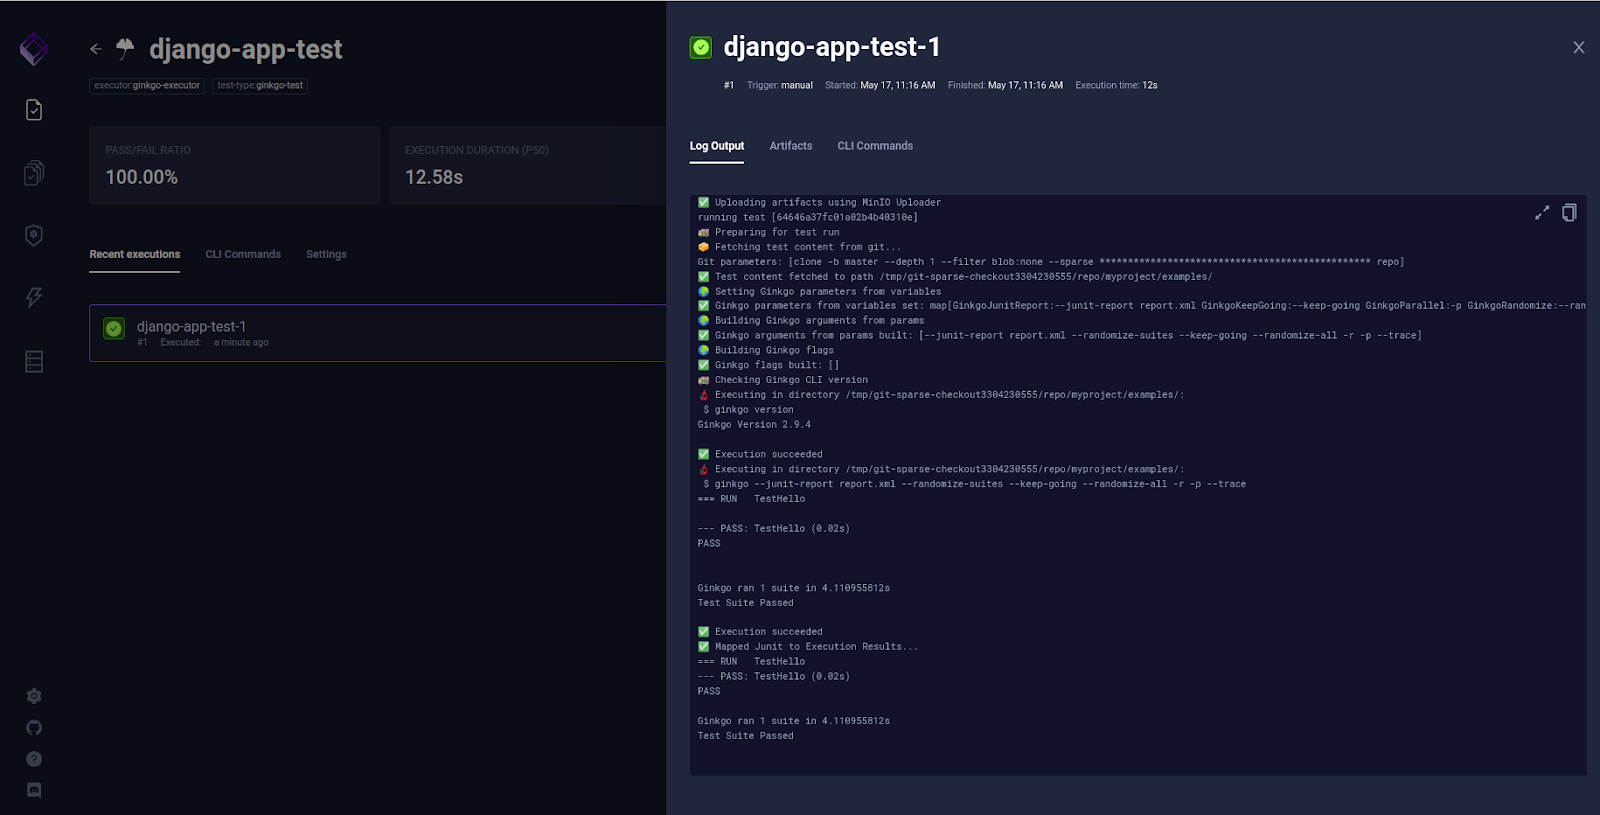
So we can see that the tests have passed.
Similarly, we can see an overview of the past results on the dashboard, along with other details like execution duration, etc.
Load tests
Now we will use the Testkube K6 executor and perform a load test for the same application we deployed above. The load test script is available as loadtest.js file in the demo repo.
-
You can run the following command to create the test.
testkube create test --name k6-test --type k6/script \
  --test-content-type git-dir \
  --git-uri https://github.com/infracloudio/testkube-django-app.git \
  --git-branch master \
  --git-path myproject/ \
  --executor-args "--vus" \
  --executor-args "5" --executor-args "--duration" \
  --executor-args "10m" --executor-args loadtest.js
Here vus stands for virtual users. We will create the test with 5 users for 10m duration.
-
After executing the above command, let’s check if the test has been created.
➜ kubectl get tests.tests.testkube.io -A NAMESPACE NAME AGE testkube django-app-test 5h52m testkube k6-test 9s -
Once the test has been created, we will run it from the UI and check the output, we need to wait for a few minutes to get the load generated for 5 users and then check the output.
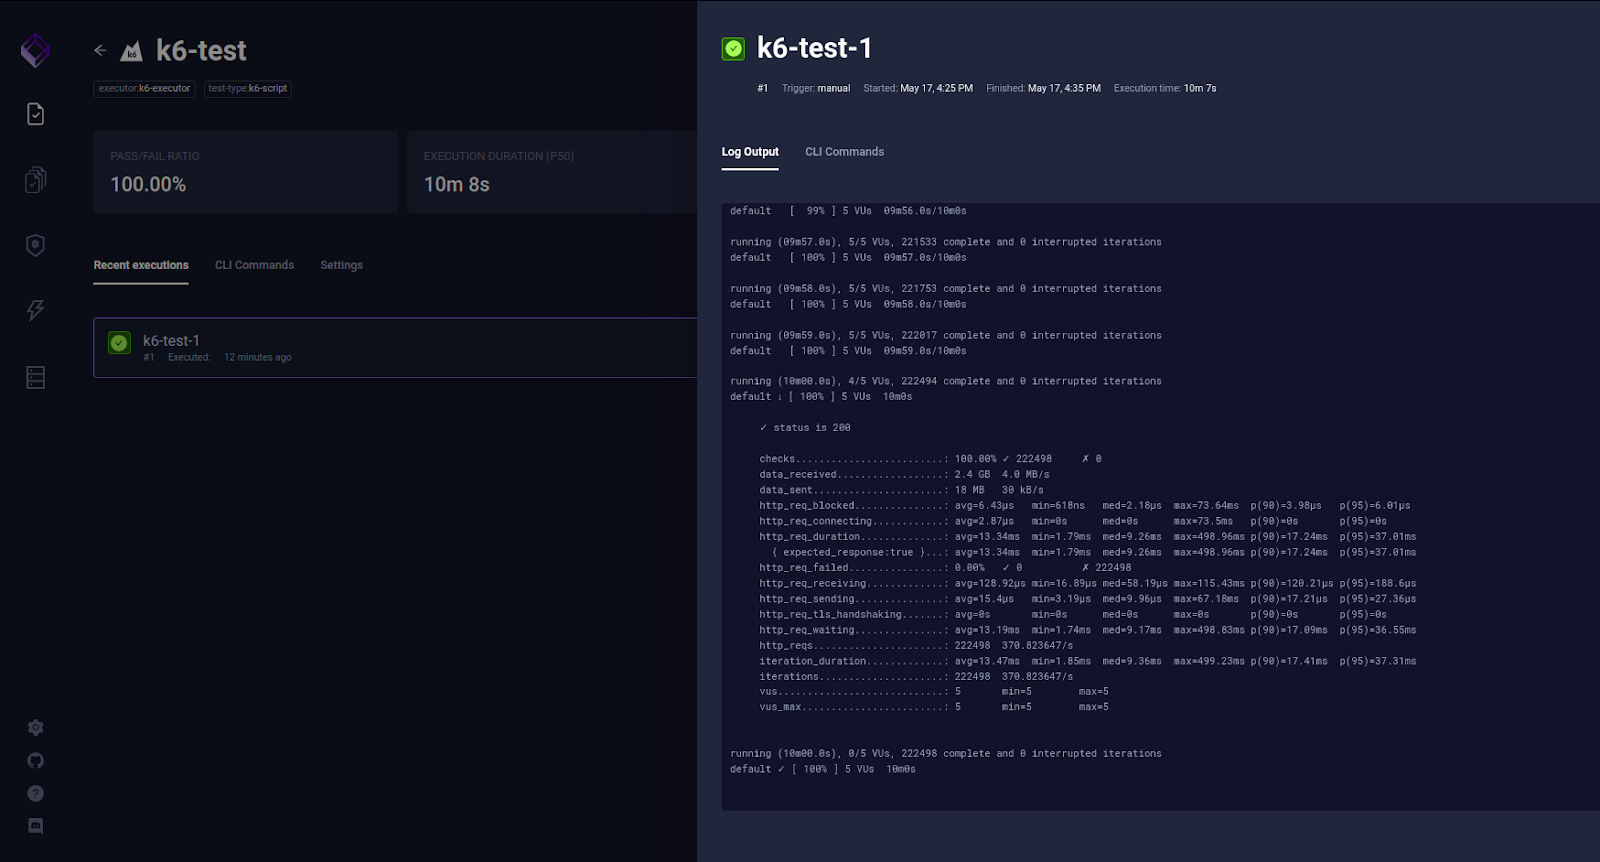
So we can see from the screenshot that the load test ran successfully with 5 virtual users.
Test triggers
Testkube allows us to automate running tests and TestSuites by defining triggers on certain events for various Kubernetes resources. A trigger defines an action that will be executed for a given execution when a certain event on a specific resource occurs. For example, we could define a trigger that runs a test when a configmap gets modified or a pod gets restarted.
To test out this feature, we will create a yaml file:
apiVersion: tests.testkube.io/v1
kind: TestTrigger
metadata:
  name: testtrigger-example
  namespace: testkube
spec:
  resource: configmap
  resourceSelector:
    labelSelector:
      matchLabels:
        app: test
  event: modified
  action: run
  execution: test
  testSelector:
    name: django-app-test
    namespace: testkube
kubectl apply -f testtrigger.yaml
We will check if the test trigger is created by running this command:
➜ kubectl get testtriggers.tests.testkube.io -A
NAMESPACE   NAME                  RESOURCE    EVENT      EXECUTION   AGE
testkube    testtrigger-example   configmap   modified   test        48m
We will create a configmap with label app=test and as soon as we modify the configmap, the test will be triggered. So in this way, we can trigger the required tests based on certain conditions like the rollout of deployment, configmap modification, pod restart, etc.
Integration with CI/CD
Here comes the most interesting part of this post – we can trigger tests in Testkube from the CI/CD pipeline. This practice decouples running your tests from the CI/CD, removes all the complexity and speeds up your CI.
In this blog post, we will be using Github Actions which enables us to run the Testkube CLI commands in a GitHub workflow. So first we will talk about setting up access to EKS from GH (GitHub) actions. We are using EKS in this case, but any other cloud platforms can also be used.
Pre-requisites
For using Github Actions to perform tasks on the cluster, we should be ready with the below points:
- An EKS cluster
- An IAM user with permission of EKS cluster
-
Update the aws-auth configmap on the cluster with username and role arn as shown in the screenshot below
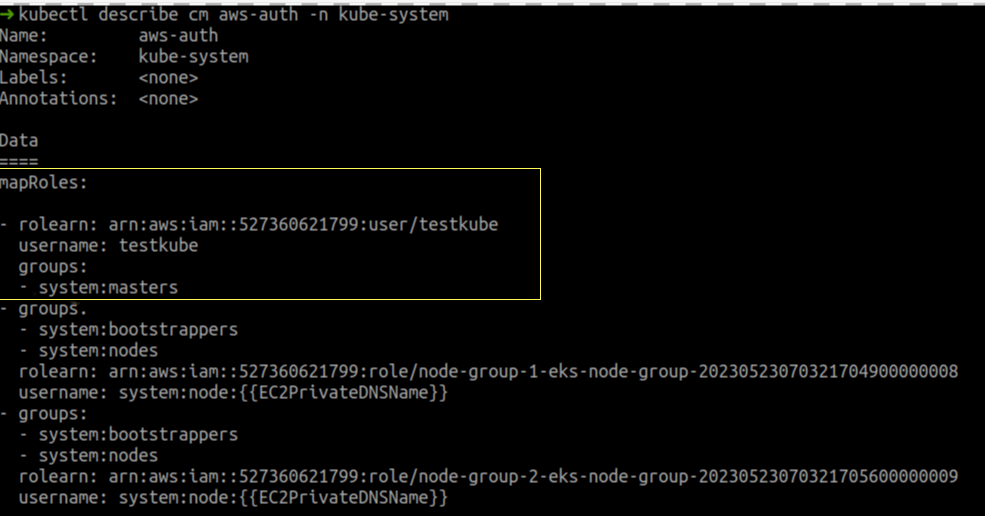
Note that to keep the post simple, we are mapping
testkubeuser tosystem:mastersgroup. For an actual setup, consider creating a specific ClusterRole/ClusterRoleBinding for a group and mapping that group withtestkubeuser to grant only minimal access. Take a look at the EKS docs for details, or use a Service Account token based kubeconfig for GitHub Actions. -
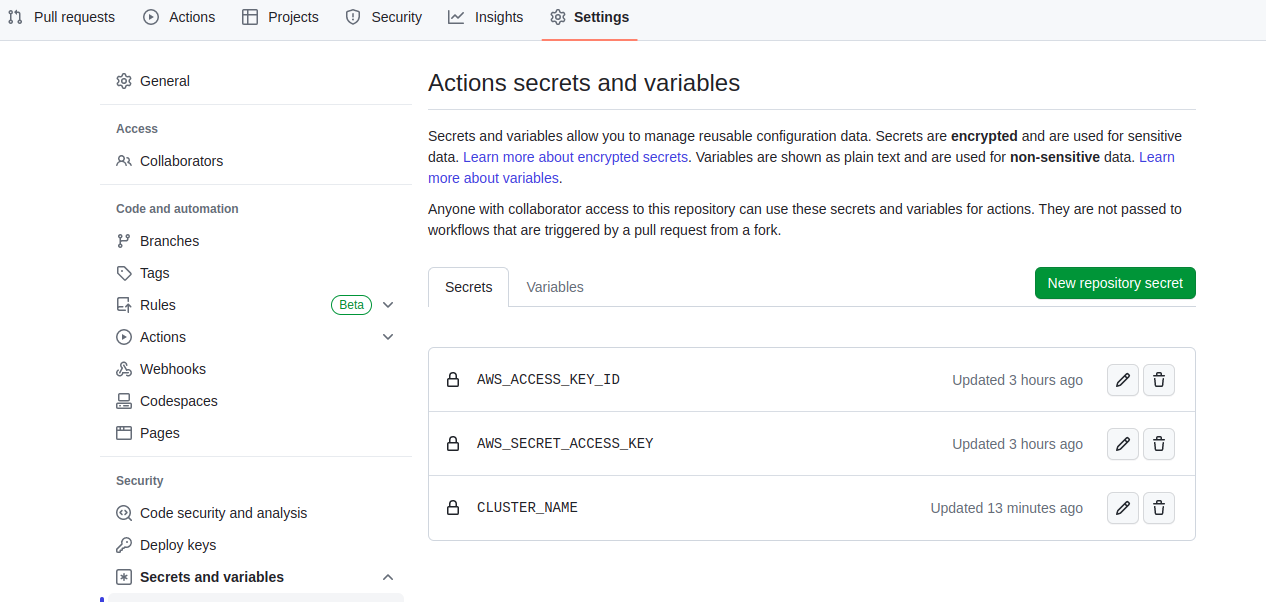
We need to create a few secrets in GitHub settings under the Secrets section as shown in the screenshot below. The access key and secret key should be of the user generated in the second step. We will be using these secrets as environment variables in the GitHub actions configuration file.
Configuration
We need to create a .github/workflow/testkube.yaml from the Actions tab. Testkube.yaml contains two jobs, job1 will establish connectivity with EKS cluster and job2 will create tests using Testkube. Here is the content of testkube.yaml
name: Testkube Docker Action
on:
 push:
 pull_request:
   branches:
     - master
env:
 AWS_ACCESS_KEY_ID: ${{ secrets.AWS_ACCESS_KEY_ID }}
 AWS_SECRET_ACCESS_KEY: ${{ secrets.AWS_SECRET_ACCESS_KEY }}
 CLUSTER_NAME: ${{ secrets.CLUSTER_NAME }}
jobs:
 job_1:
   name: test workflow for AWS
   runs-on: ubuntu-latest
   steps:
   - name: AWS cli install action
     uses: chrislennon/action-aws-cli@1.1
   - name: Configure AWS credentials
     uses: aws-actions/configure-aws-credentials@v1
     with:
       aws-access-key-id: ${{ secrets.AWS_ACCESS_KEY_ID }}
       aws-secret-access-key: ${{ secrets.AWS_SECRET_ACCESS_KEY }}
       aws-region: ap-south-1
   - name: kubeconfig
     run: |
       aws eks update-kubeconfig --name ${{ env.CLUSTER_NAME }} --region ${{ env.AWS_REGION }}
   - name: Upload kubeconfig file
     uses: actions/upload-artifact@v3
     with:
       name: kubeconfig
       path: /home/runner/.kube/config
 job_2:
   name: create test using testkube
   needs: job_1
   runs-on: ubuntu-latest
   steps:
   - name: Download kubeconfig from job 1
     uses: actions/download-artifact@v3
     with:
      name: kubeconfig
   - shell: bash
     run: |
       export KUBECONFIG=/home/runner/work/testkube-test/testkube-test/config
   - name: Create test
     id: create_test
     uses: kubeshop/testkube-docker-action@v1.3
     env:
       KUBECONFIG: /home/runner/work/testkube-test/testkube-test/config
       KUBERNETES_MASTER: /home/runner/work/testkube-test/testkube-test/config
     with:
       command: create
       resource: test
       namespace: testkube
       parameters: "--git-uri https://github.com/infracloudio/testkube-django-app.git --git-path myproject/examples/ --type ginkgo/test --name testkube-github-action --git-branch master"
If you wish, you can try creating another test or use the same example used in this blog post. Once you push the changes, the workflow will get triggered. We can check it in the Actions section.
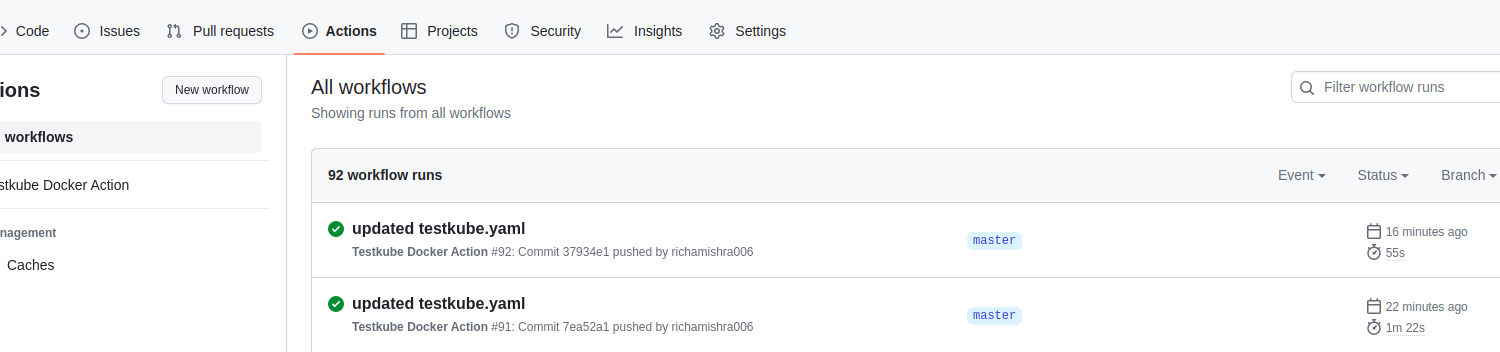
Once the job is completed successfully, you will see that the test has been created in the cluster.
➜ kubectl get tests -A
NAMESPACE   NAME                     AGE
testkube    testkube-github-action   18m
Summary
Testkube is a test execution and orchestration framework for Kubernetes. It has the capability to run any testing tool and integrates with any CI/CD application. It defines tests as Kubernetes CRDs to provide a modern solution for managing all your tests, eliminating CI/CD bottlenecks, and scaling your tests with your needs.
In this blog post, we have focused mainly on the Testkube installation, test creation and execution (for a demo application), test triggers, and integration with CI/CD. With basic groundwork covered, you can run your first test using Testkube.
I hope you found this post informative and engaging. For more posts like this one, do subscribe to our newsletter for a weekly dose of cloud native. I’d love to hear your thoughts on this post, let’s connect and start a conversation on LinkedIn.
Looking to be truly cloud native? Learn why so many startups and enterprise trust InfraCloud as one of the best cloud native consulting services provider for Kubernetes adoption and Day 2 operations.
References
Stay updated with latest in AI and Cloud Native tech
We hate 😖 spam as much as you do! You're in a safe company.
Only delivering solid AI & cloud native content.
Posts You Might Like